


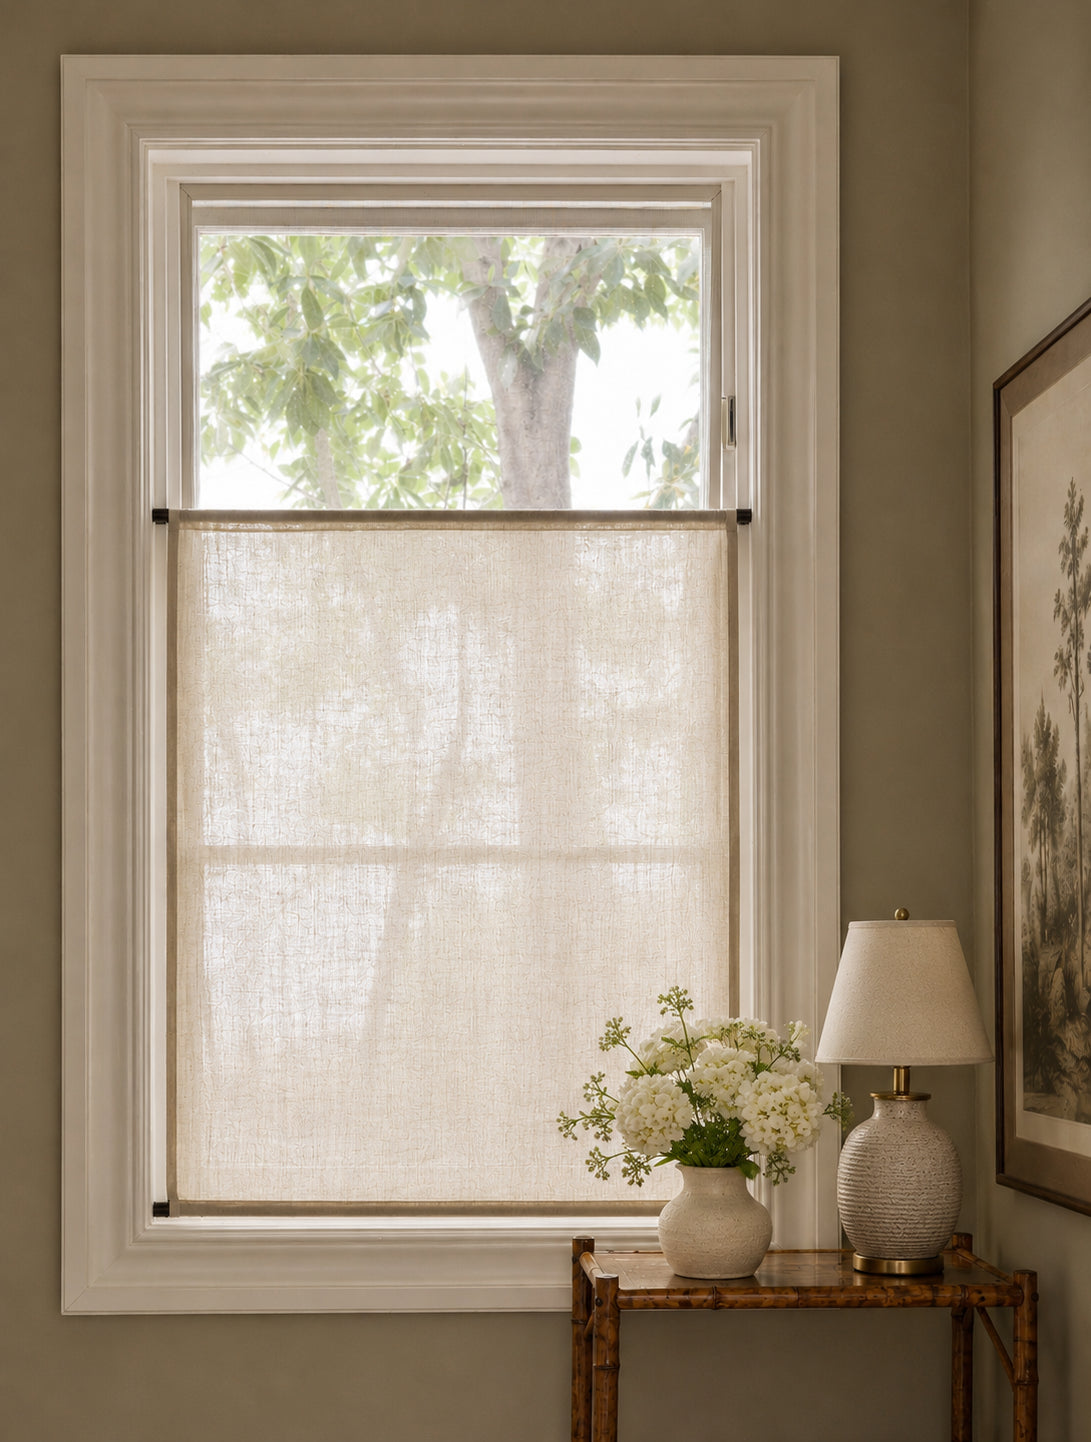
Flat Roman
Clean, architectural lines. Lies flat when lowered for a tailored, modern look.
Our expertise meets your vision.
Your guide to shades — by Everhem experts
A considered walk-through of every decision that shapes a custom shade — from fabric and style to how it opens, where it sits, and how you live with it.

01 — Shade Type
The silhouette sets the tone. Begin here — every decision that follows builds on the style you choose.
Clean, architectural lines. Lies flat when lowered for a tailored, modern look.

Structured horizontal folds that stack evenly when raised — classic and considered.

A soft smile at the hem. Effortless, slightly romantic, and unlined by nature.

Two soft gathers create subtle drape at the sides — traditional with quiet personality.

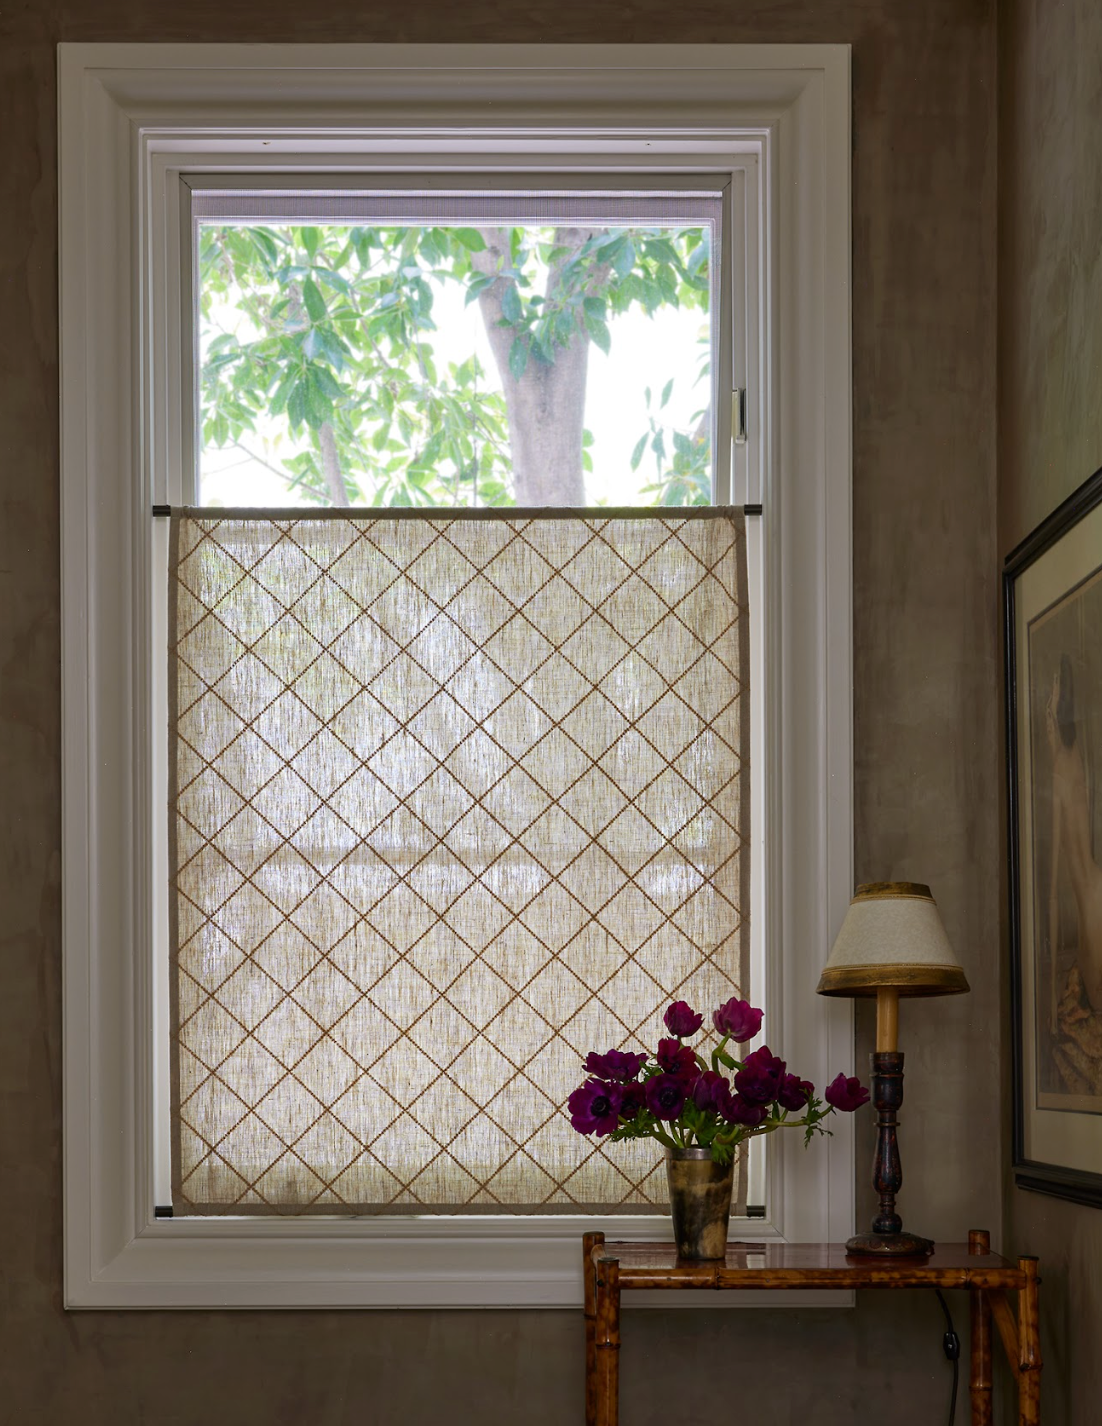
Natural grasses, reeds, and bamboo. Textural warmth and filtered, golden light.

Minimal profile, maximal utility. A smooth wrap around a slim tube — ideal anywhere.
02 — Fabric & Color
Explore our designer-curated collections organized by hand, weave, and finish. See it in your space before you decide.
Everhem Hues
7 fabrics

Quartz

Driftwood

Flax

Granite

Umber

Cognac

Juniper
Everhem Essentials
7 fabrics

Moon

Bone

Sand

Birch

Ash

Sage

Rose
Jake Arnold for Everhem
11 fabrics

Haze

Saffron

Diamond Magnolia

Parchment Magnolia

Gardenia

Limestone

Mist

Citrine

Magnolia Sheer

Parchment Sheer

Parlor Stripe Sheer

Sudare Kurumi

Lotus Trim

Medallion Trim

Willow Trim
Sheers
3 fabrics

Moon Sheer

Bone Sheer

Pebble Sheer
Carly Kuhn Collection
4 fabrics

Starry Moons

Winking Diamonds

Dainty Rose

Circus Circus
03 — Lining
Lining determines how much light moves through your shade. Choose based on the function of your space, how it's used, and how much privacy and light control you want.

Choose a sheer fabric for the softest diffused light and an airy presence in the room.

Fabric-focused, with gentle daytime privacy and warm, filtered light.

A lining added to your selected fabric — blocks sightlines while diffusing soft, ambient light through.

A lining added to your selected fabric — room-darkening for bedrooms, media rooms, and sleep spaces.
04 — Mount Position
Where the shade lives on your window.

Sits inside the window frame for a clean, built-in look.
Best for: trim you want to show, deeper windows, architectural moments.
Depth requirement
2.5" minimum
We require 2.5" of depth to inside mount. Measure the flat mounting surface available on your window.
Installs on the wall or trim above the window. Covers more area and blocks more light.
Best for: shallow windows, hiding imperfect trim, maximum light control.
Projection
2"–3" from the wall
Shades will have a 2"–3" projection depending on shade width.

05 — Custom Control
The control is the part you'll touch every day. Choose based on how the space is used — and who uses it.

An antique brass metal chain, structured in a continuous loop. Durable and precise.

Operated by a wooden tassel that sits on the back of the shade at the bottom center — a retracting cordless mechanism, not a manual push-and-pull. Child- and pet-safe by design.

Remote shade operation with the press of a button. A luxury experience — ideal for hard-to-reach or tall windows.
06 — Shade Operation
How the shade is constructed on the headrail — how the fabric falls toward the room or toward the window.

The fabric falls off the back of the headrail, and a valance is added in the front to conceal the hardware.
If Chain Loop is selected, the chain is visible when the shade is drawn closed — for easy access when opening or closing.
Recommended for outside-mount shades with blackout lining.
The fabric falls off the front of the headrail — a waterfall with no valance.
If Chain Loop is selected, the control is featured in the front.
Note: no valance means that for outside mount, the projection is exposed. Shades will have a 2"–3" projection depending on shade width.

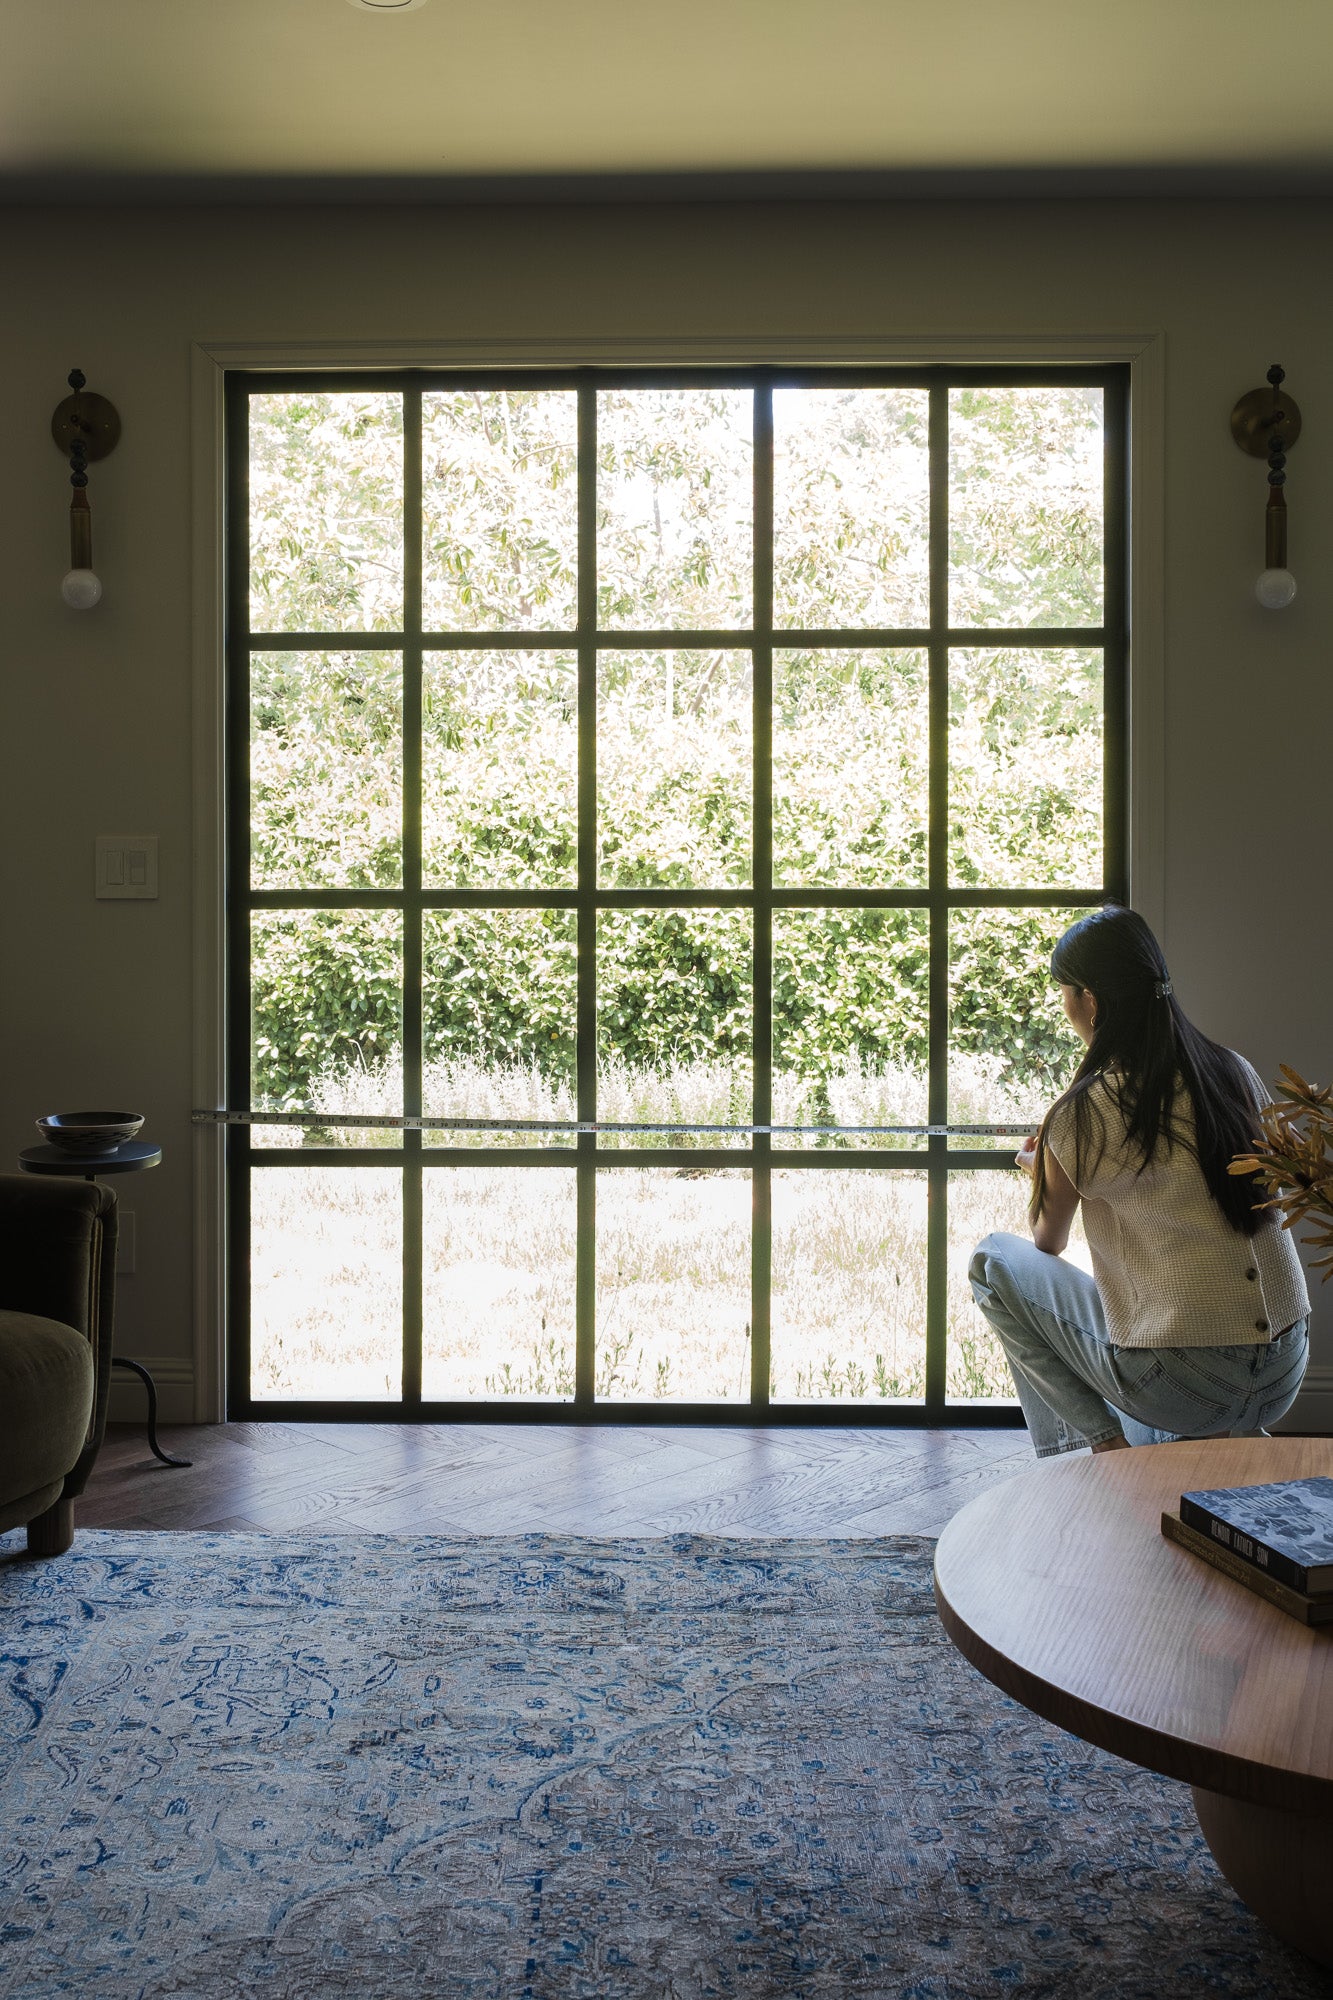
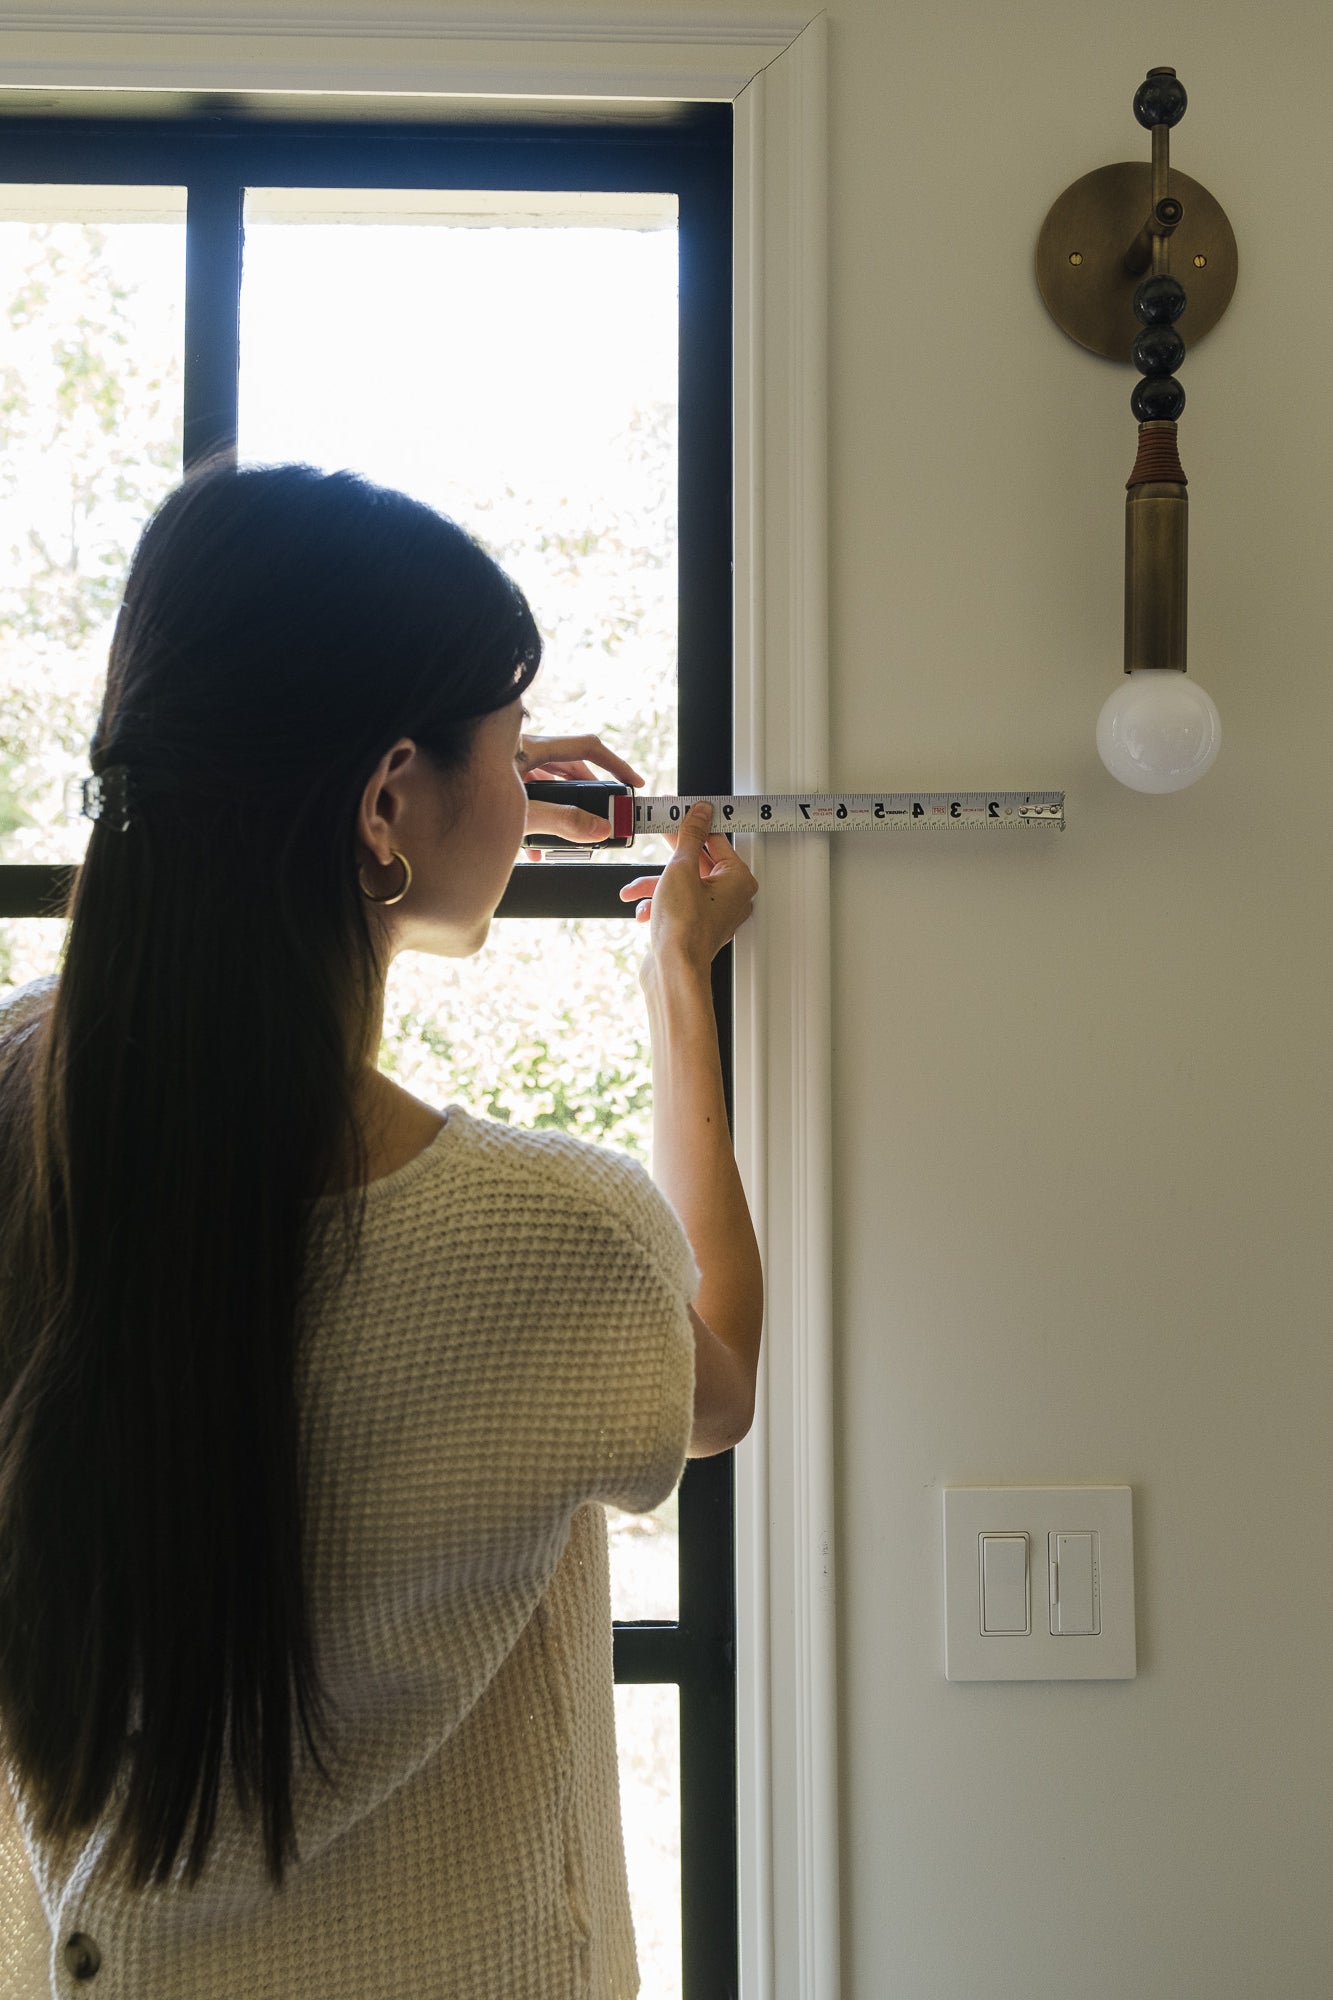
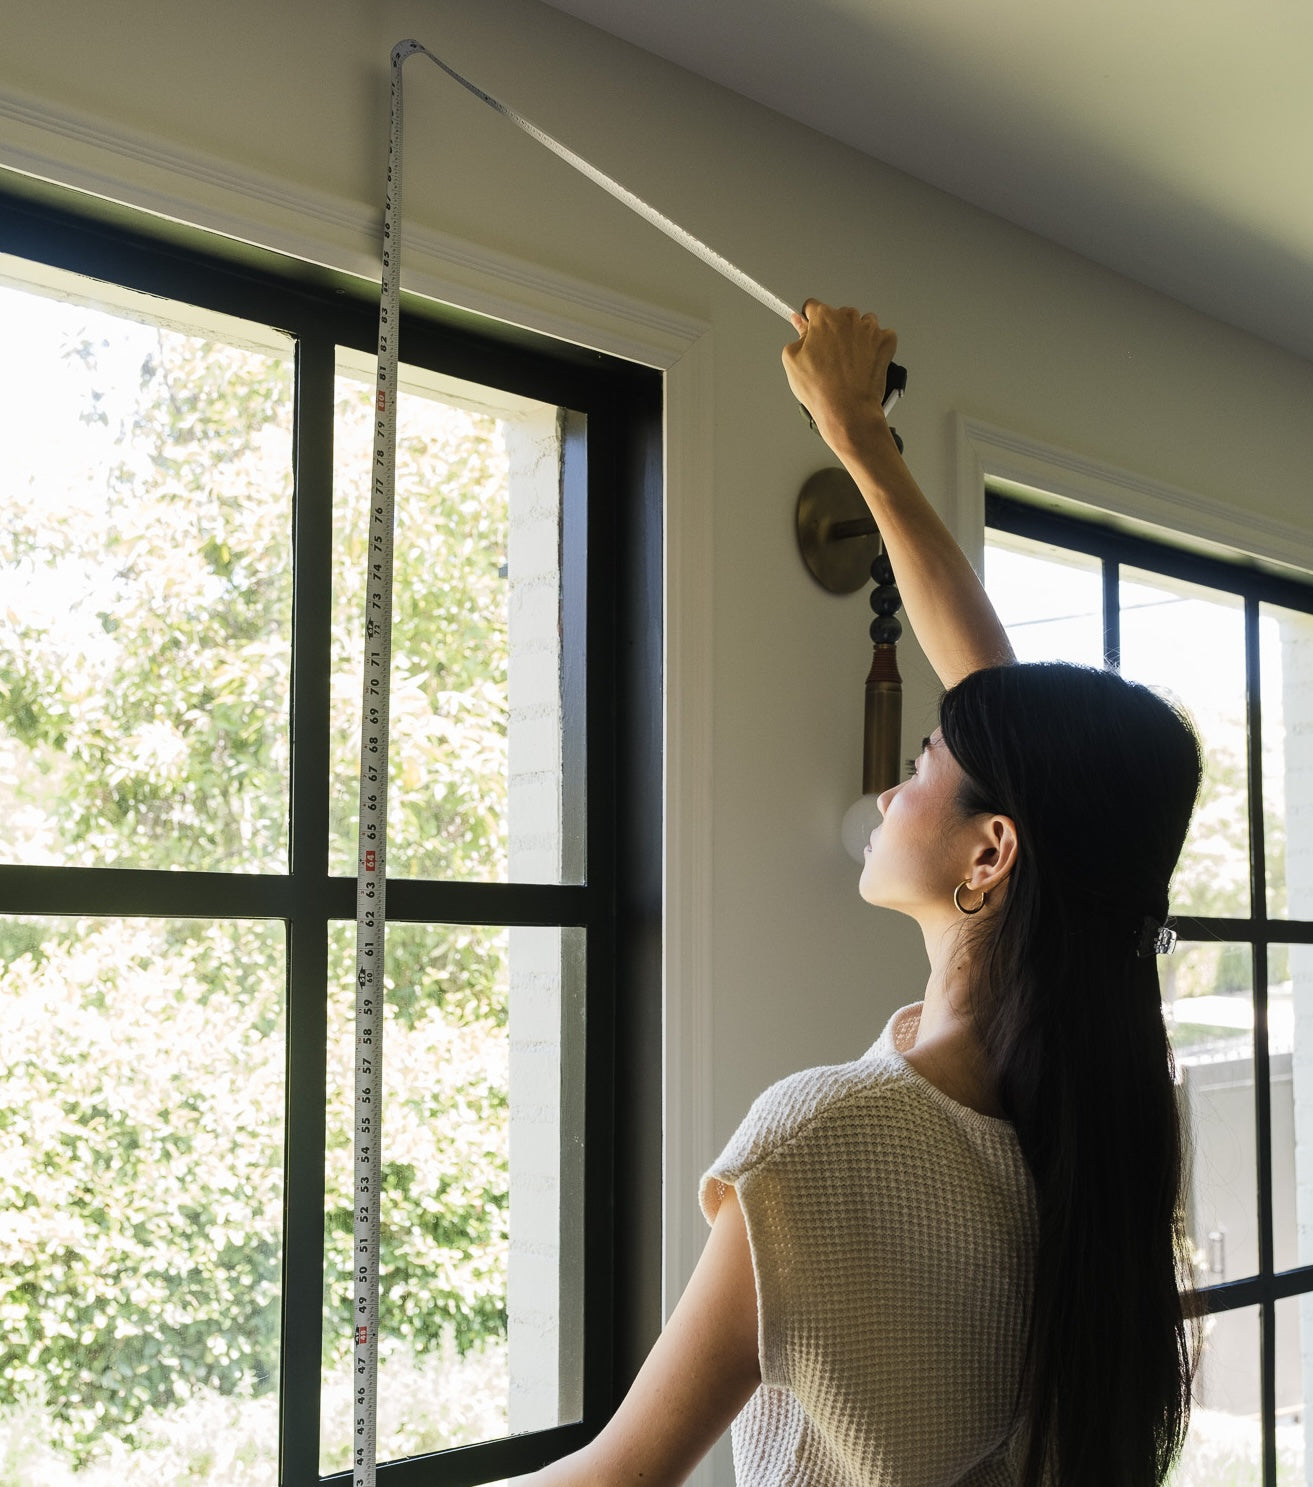
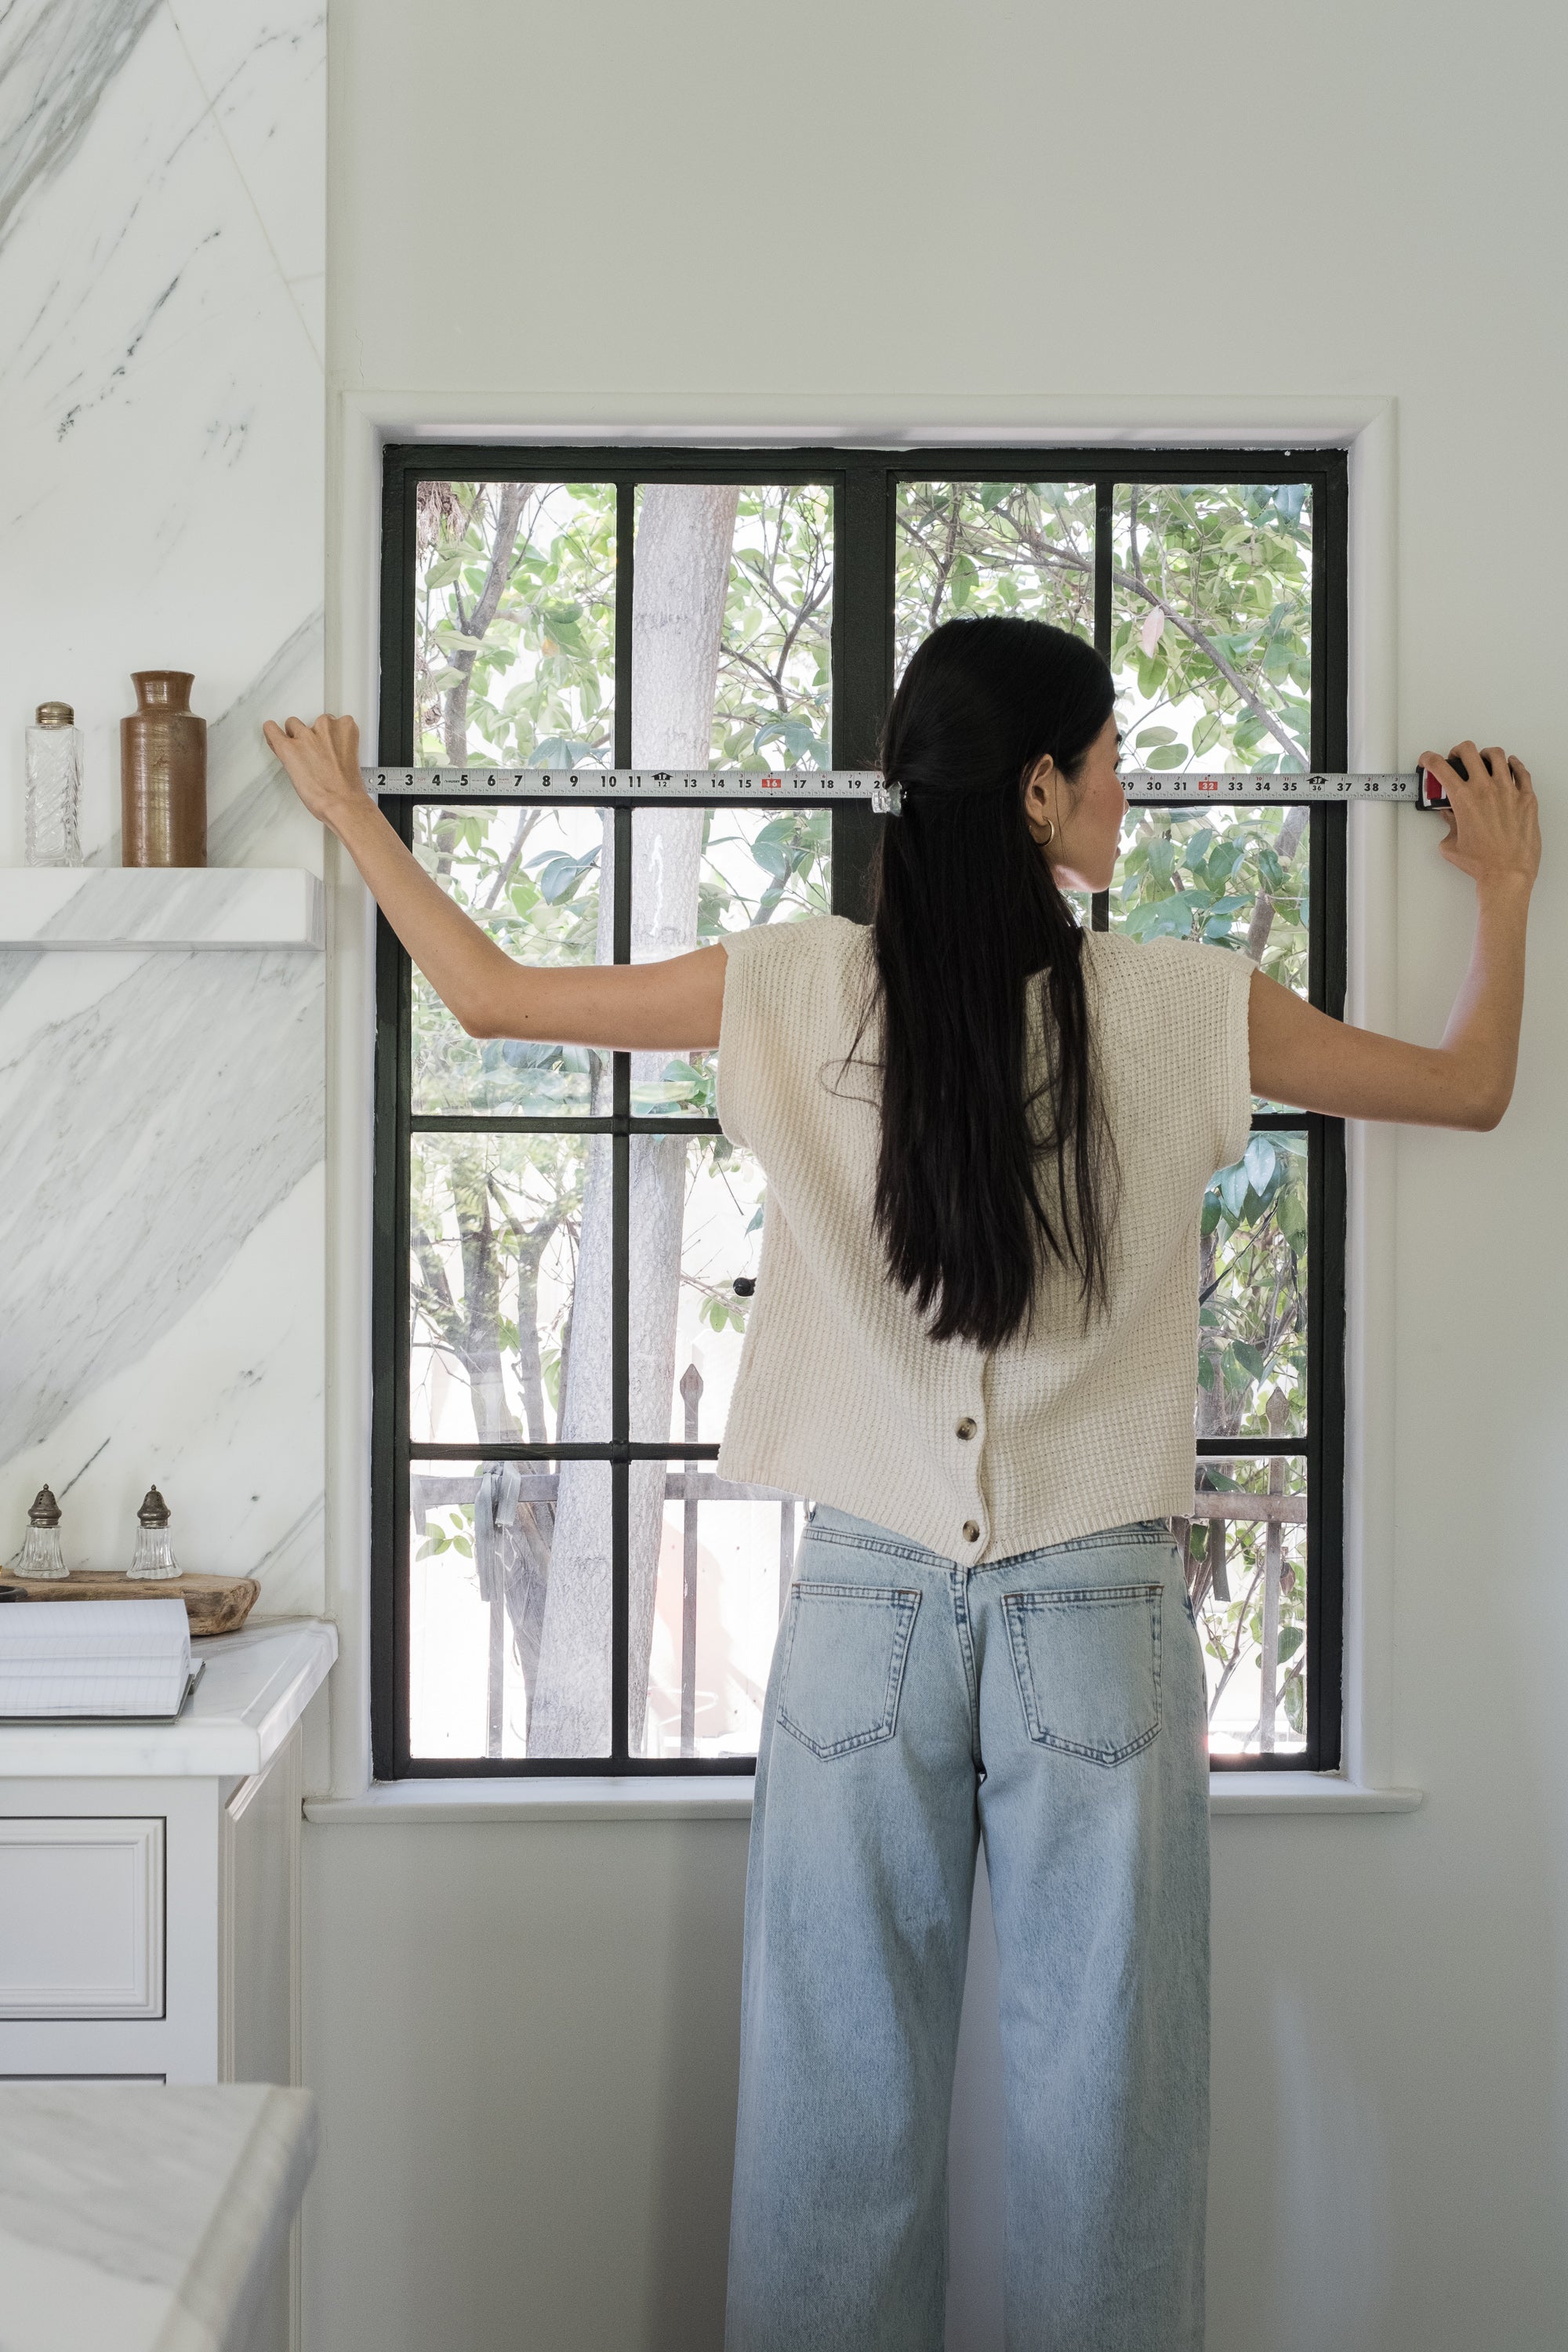
07 — How to Measure
A tape measure is all you need.
Pro note — your tape measure needs ⅛" tick marks visible.
Measured on the interior of the window frame.

Step 01
We require 2.5" of depth to inside mount. Measure the flat mounting surface available on your window.

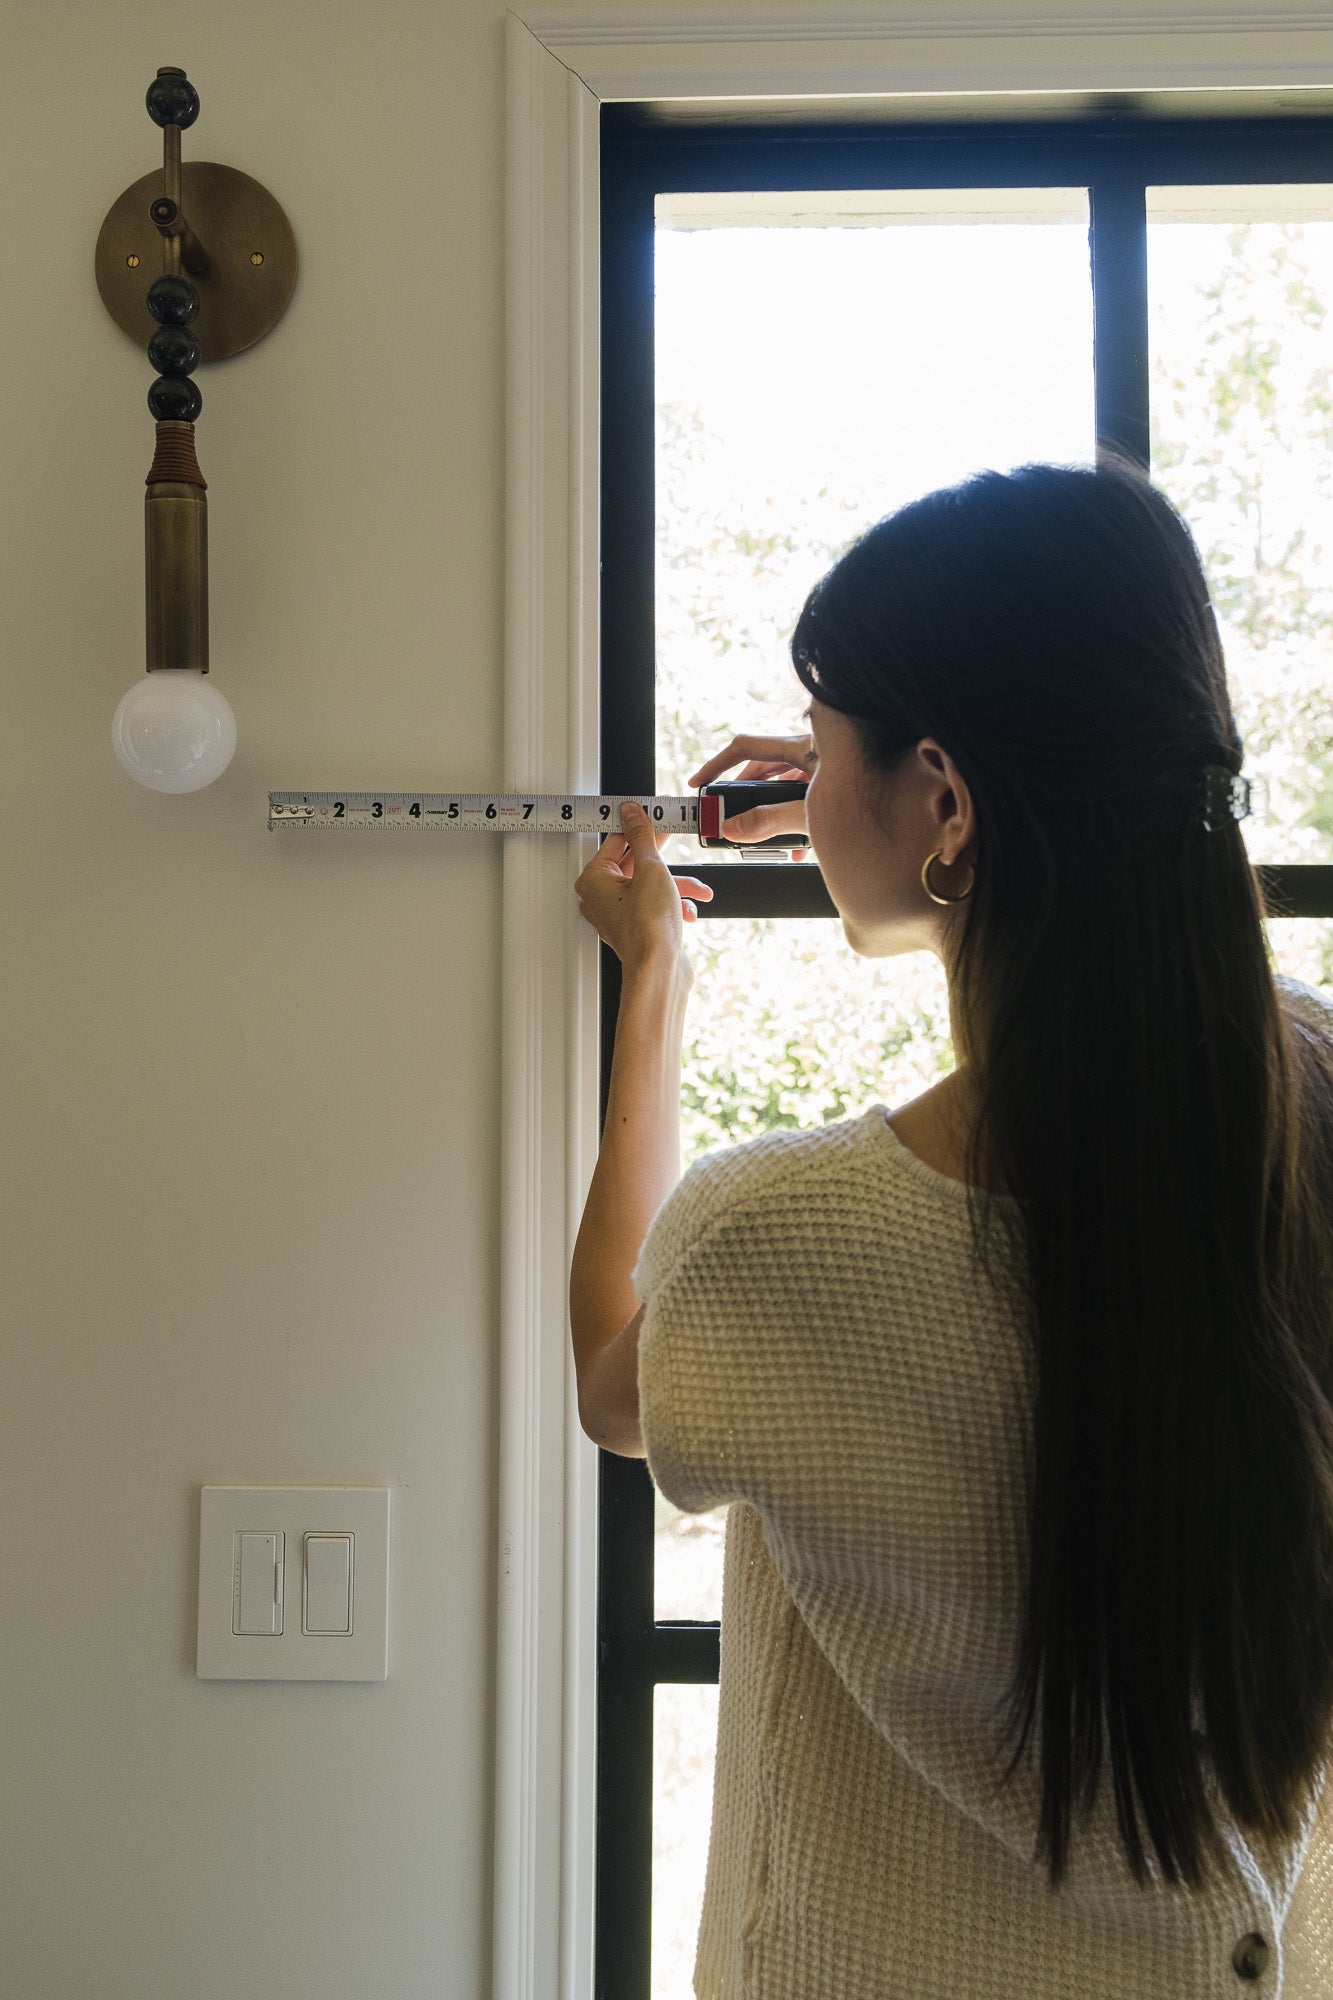
Step 02
Rounding to the nearest ⅛", measure in three places — top, middle, and bottom. Use the narrowest.

Step 03
Rounding to the nearest ⅛", measure in three places — left, middle, and right. Use the longest.
Measured on the outline of the finished window frame, including trim.

Step 01
Measure across the finished window frame, rounded to the nearest ⅛".

Step 02
Measure the height of the finished window frame, rounded to the nearest ⅛".

Step 03
For wall mount — the most common — we suggest 5". If trim projection is greater than ¾", reach out for a custom solution.
Add width for coverage
We suggest 1"–2" per side for optimal coverage, especially with blackout lining.

Add length for coverage
With no sill, add length to your window height equal to the additional width per side. Added 1" per side to width? Add 1" to height — before adding your mounting height.
Mounting height guide
Wall mount — 5" above the window (most common).
Trim mount — 0" mounting height, flush with the top of the window trim.
Door mount — 3"–4" mounting height, depending on available space.
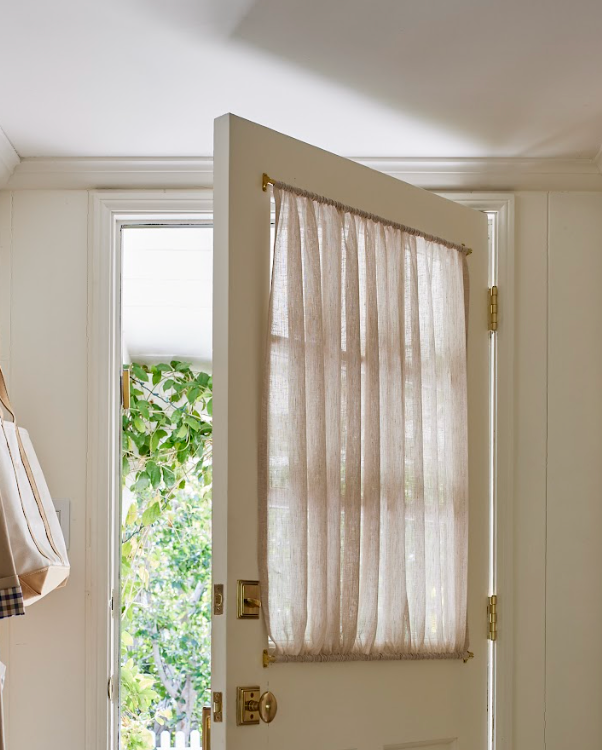
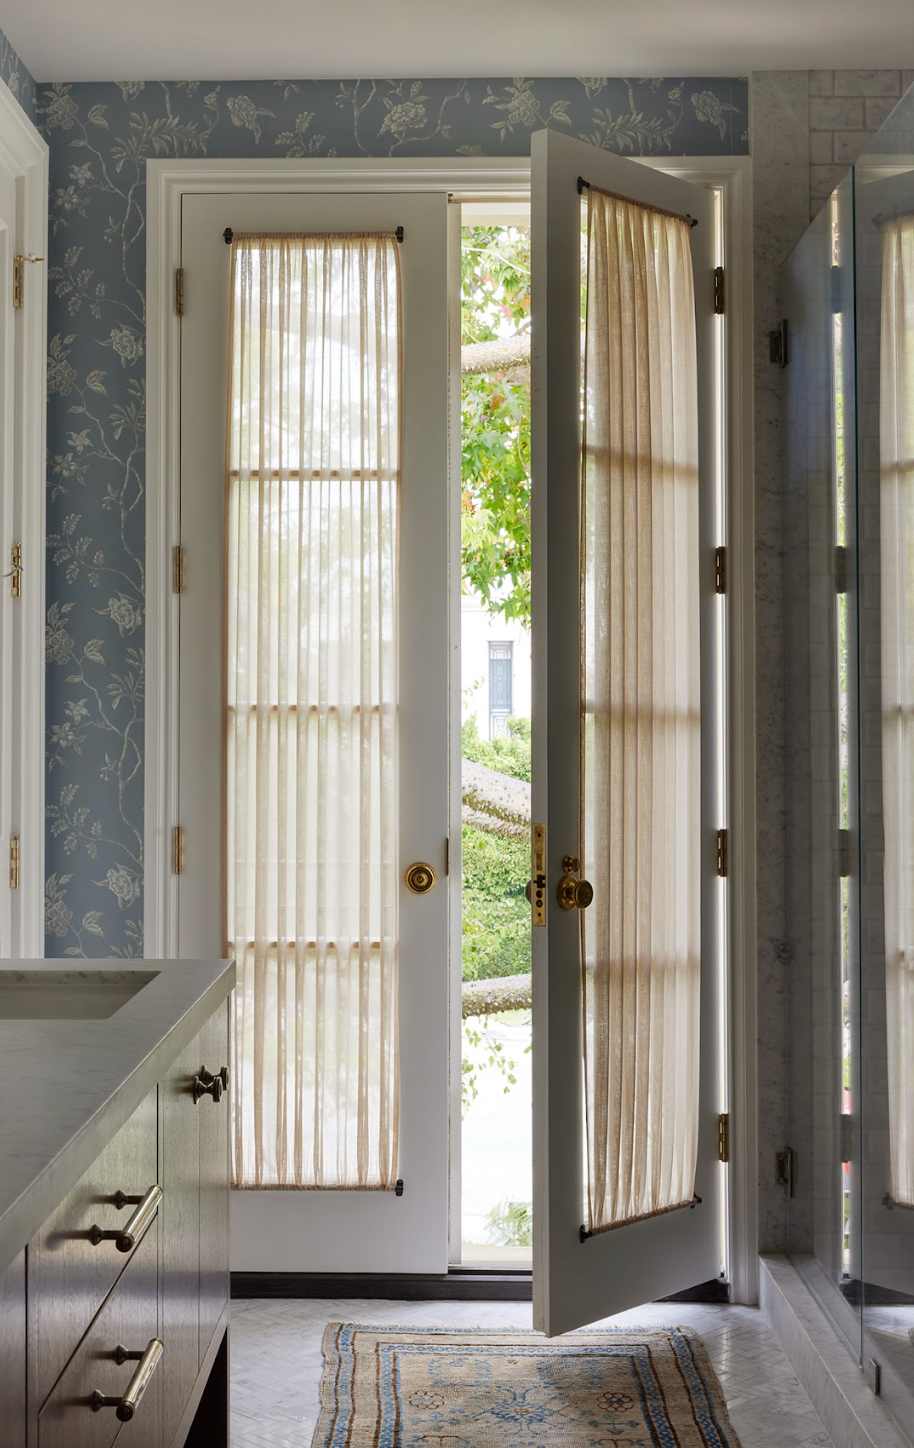
For shades installed on a door with a glass insert — measured on the glass, not the door.

Step 01
Measure the glass width on the door, rounded to the nearest ⅛".

Step 02
Measure the glass height on the door, rounded to the nearest ⅛".

Step 03
For door mount, we suggest 3"–4" above the glass, depending on the space available.
Add width for coverage
Add as much width as you can without hindering your door hardware — deadbolts, handles, or locks at the side of the glass.

Add length for coverage
We suggest adding 1" to the bottom — before adding your mounting height.

Mounting height guide
Standard — 3"–4" above the glass.
Hardware clearance — make sure the mount clears any deadbolts, handles, or locks at the top of the door.
Limited space? Reach out for a custom solution.
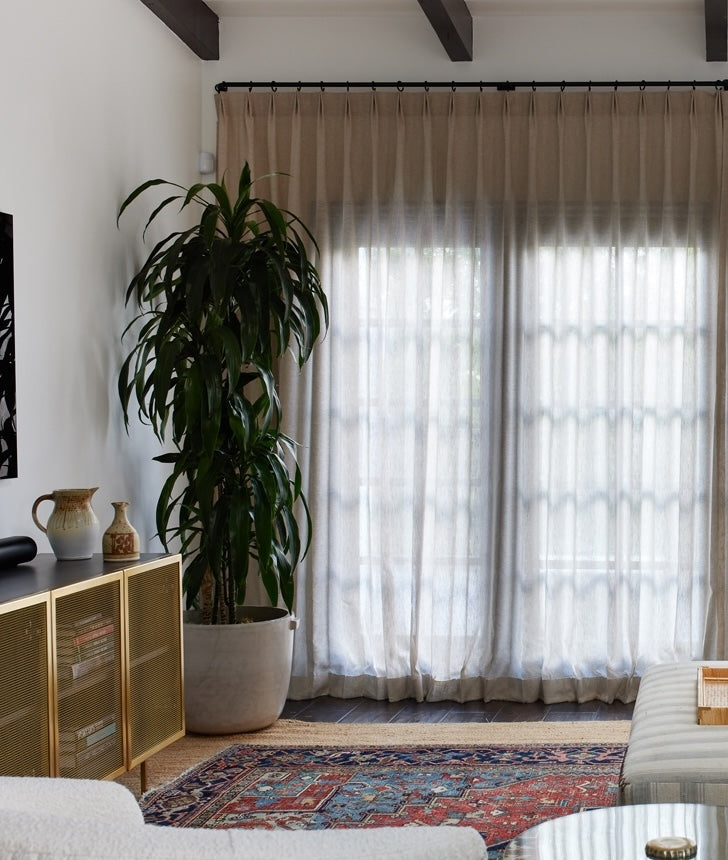
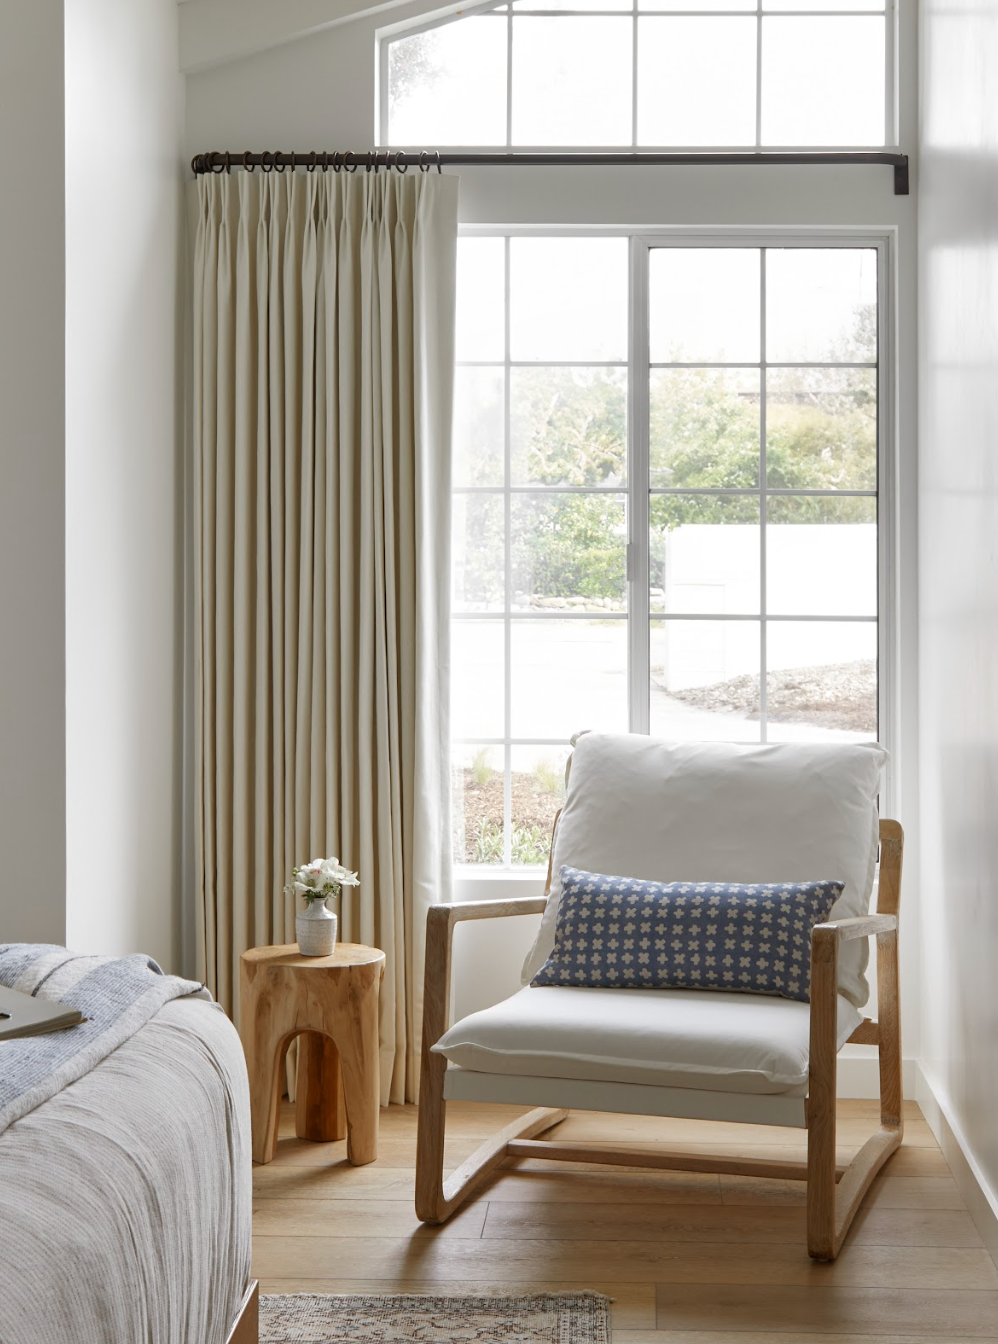
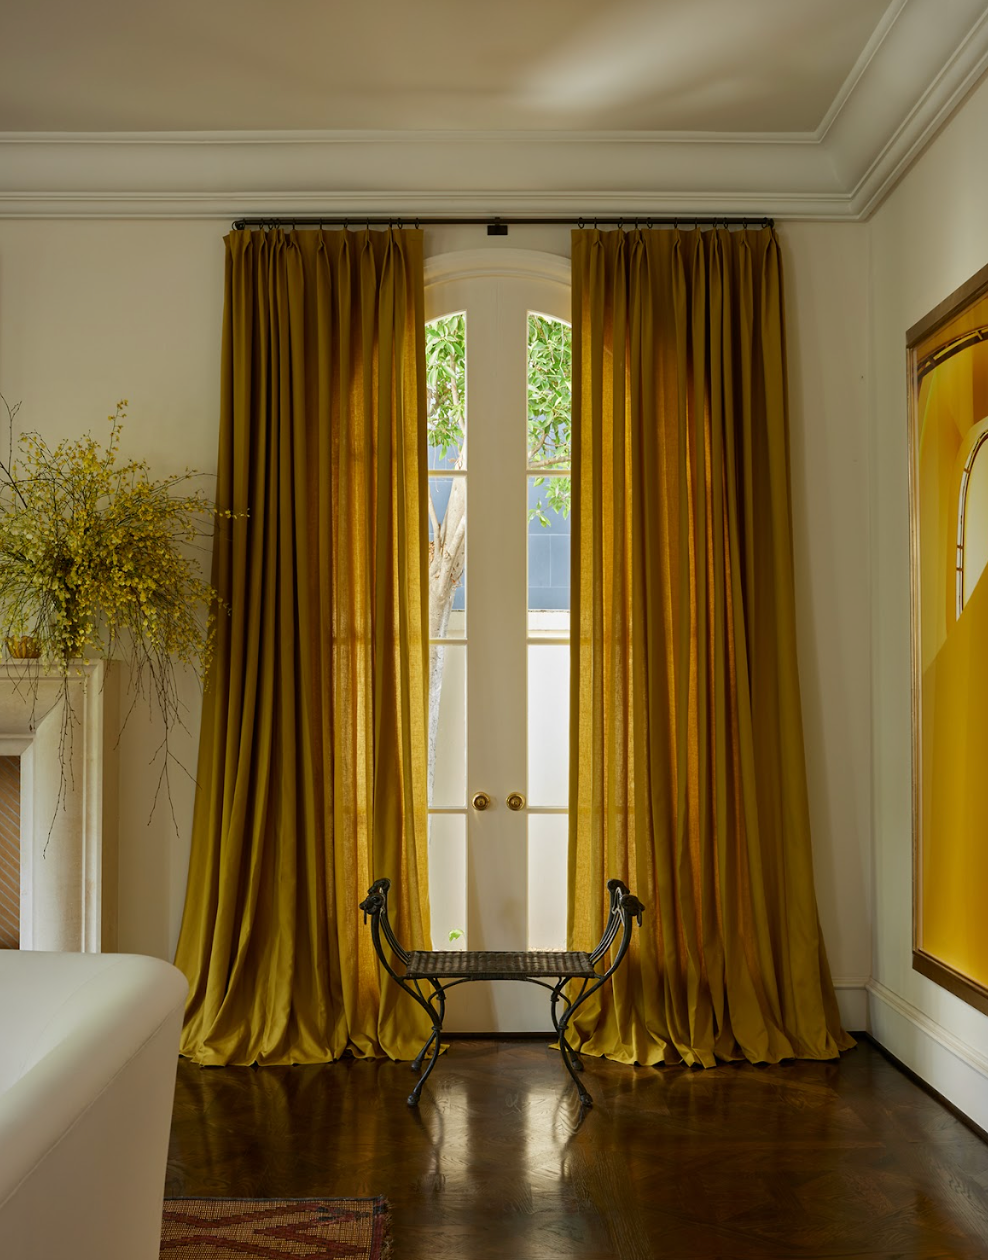
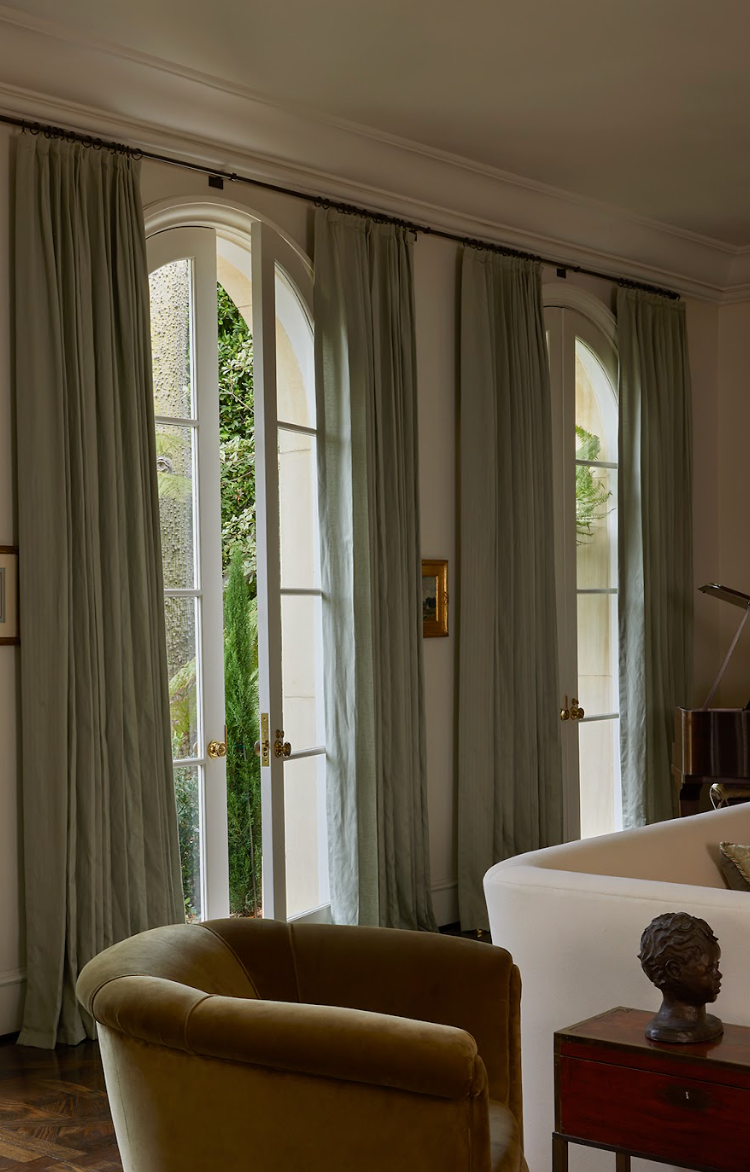
Your guide to drapery — by Everhem experts
A considered walk-through of every decision that shapes a custom drapery — from pleat and fabric to hardware, panel layout, and how it lives in your space.

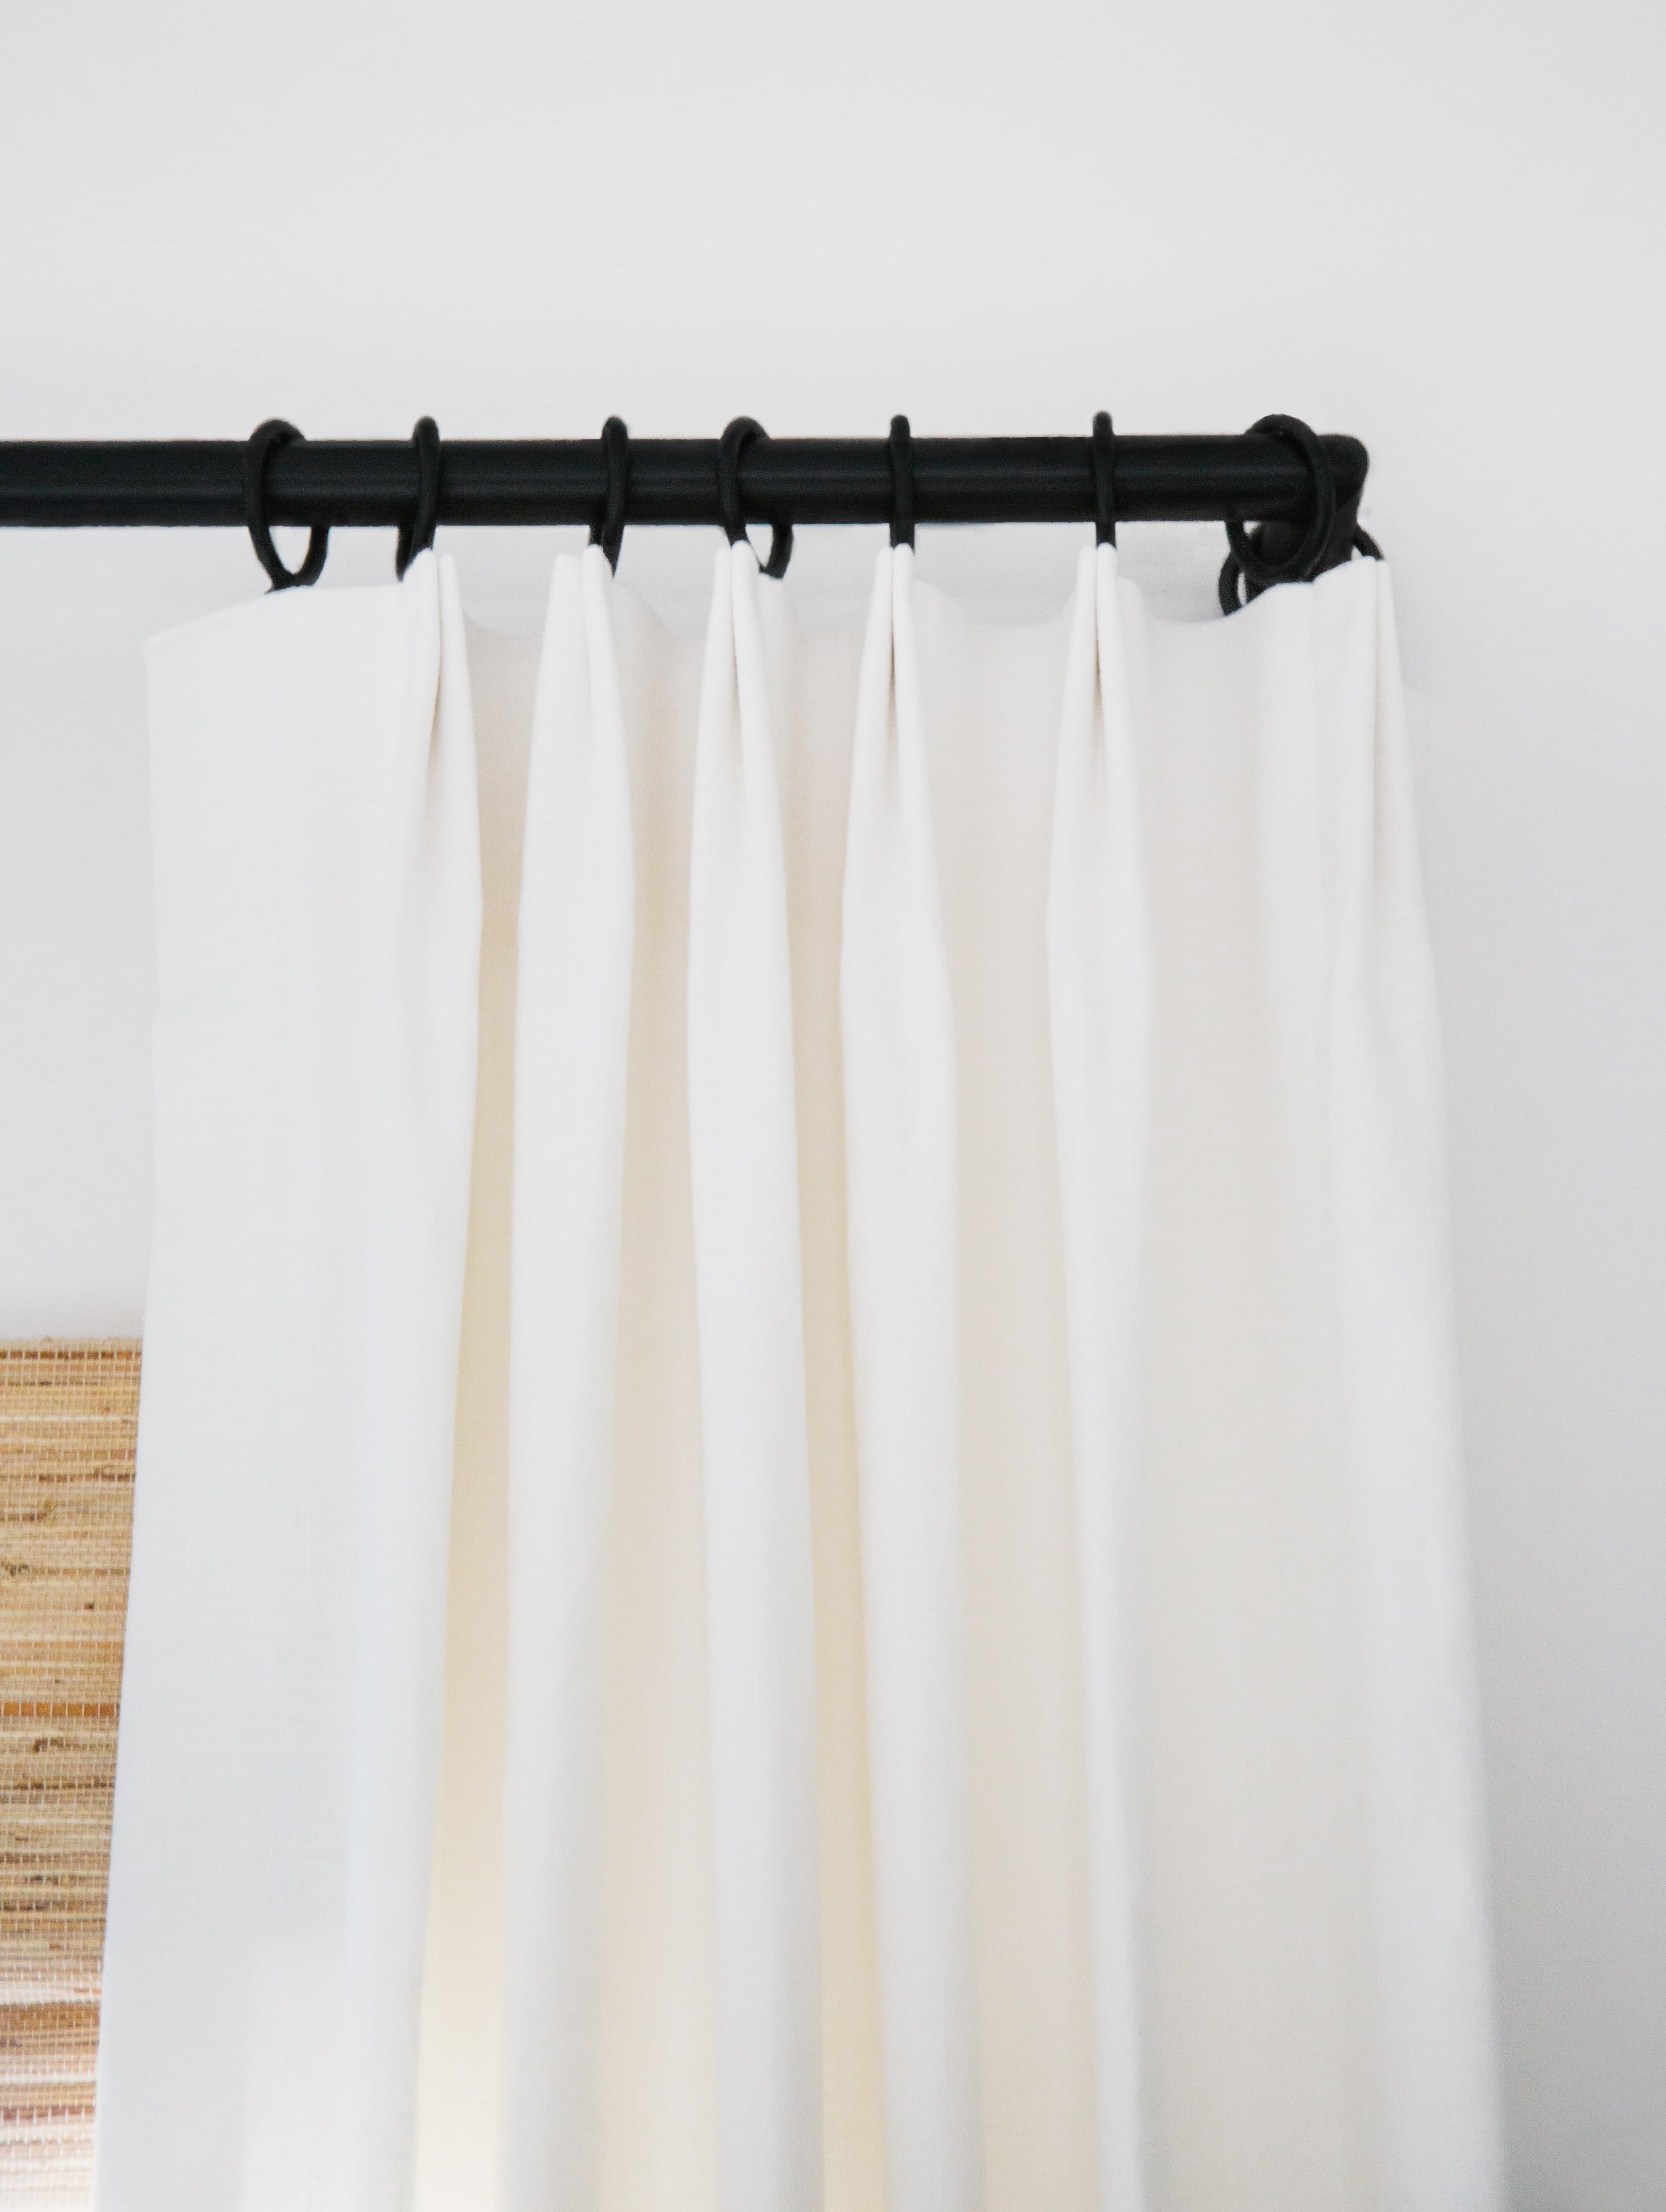
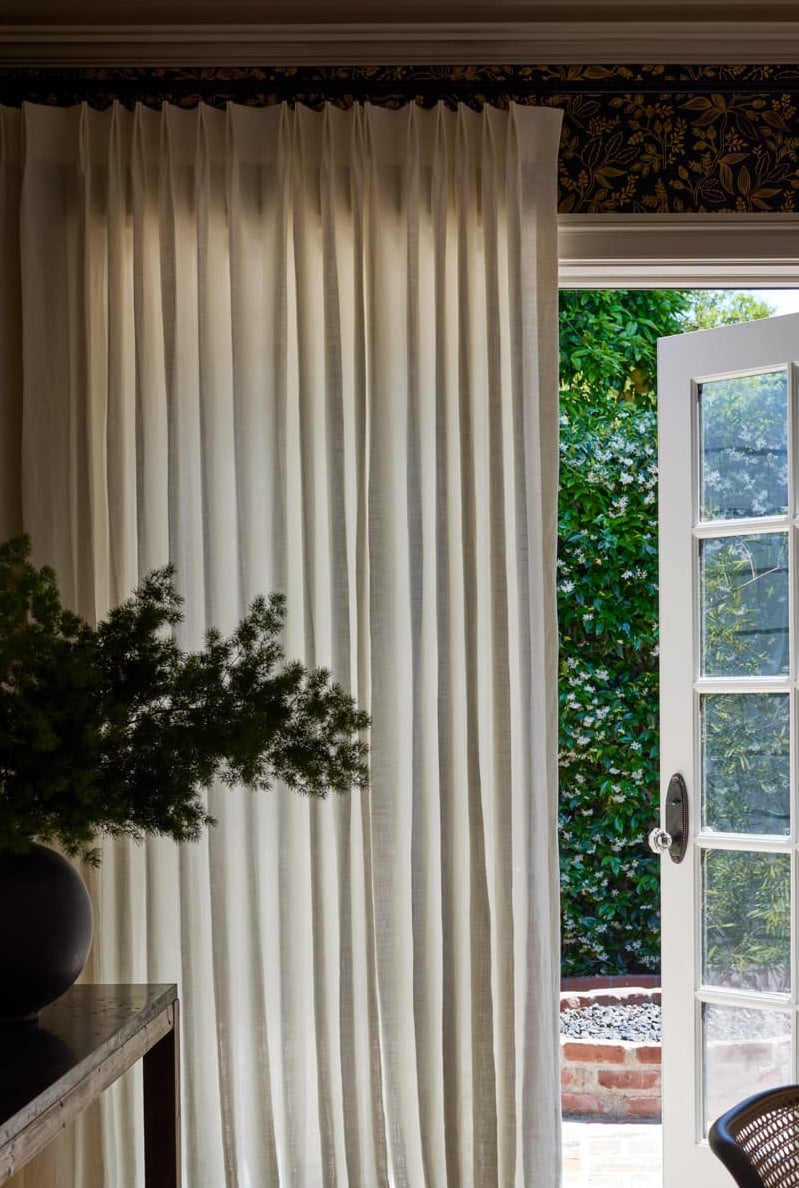
01 — Pleat Style
The pleat sets the tone of your drapery — every decision that follows builds on the silhouette you choose.
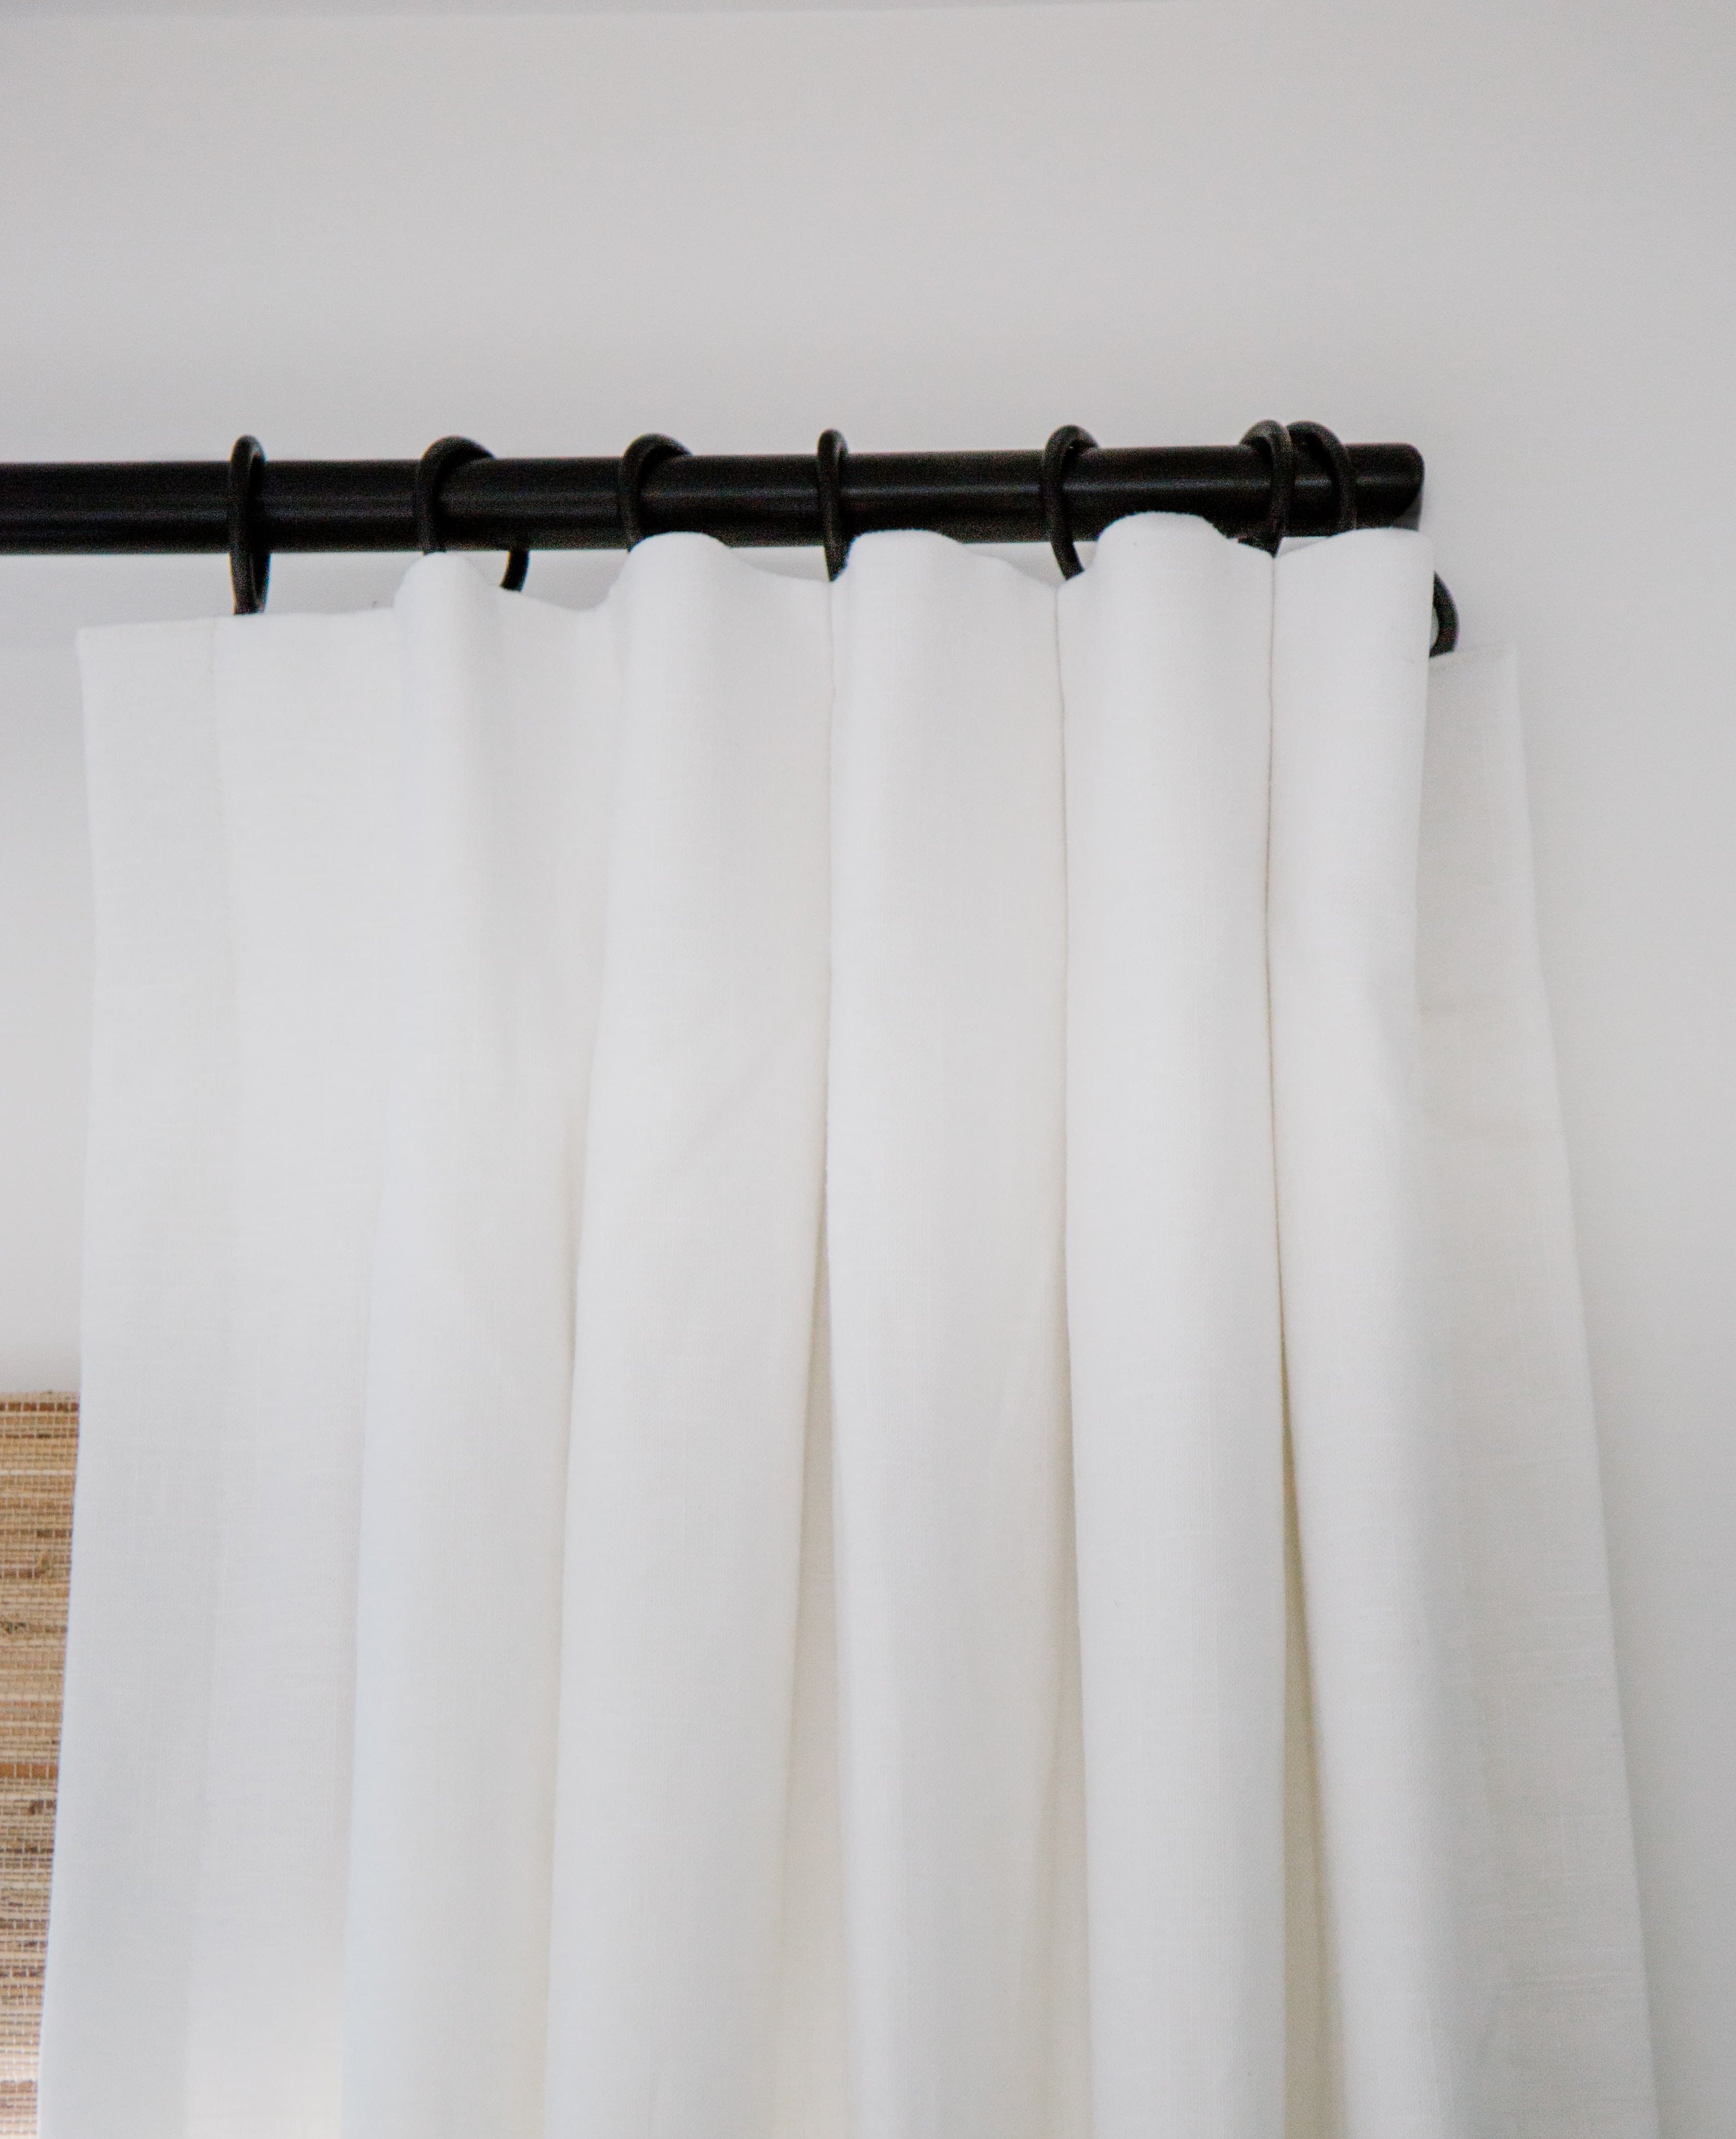
Crisp, structured folds with flat fronts. Tailored, architectural, and quietly graphic.
A clean, modern fold — flat at the top with subtle rolling fullness below. Classic restraint.
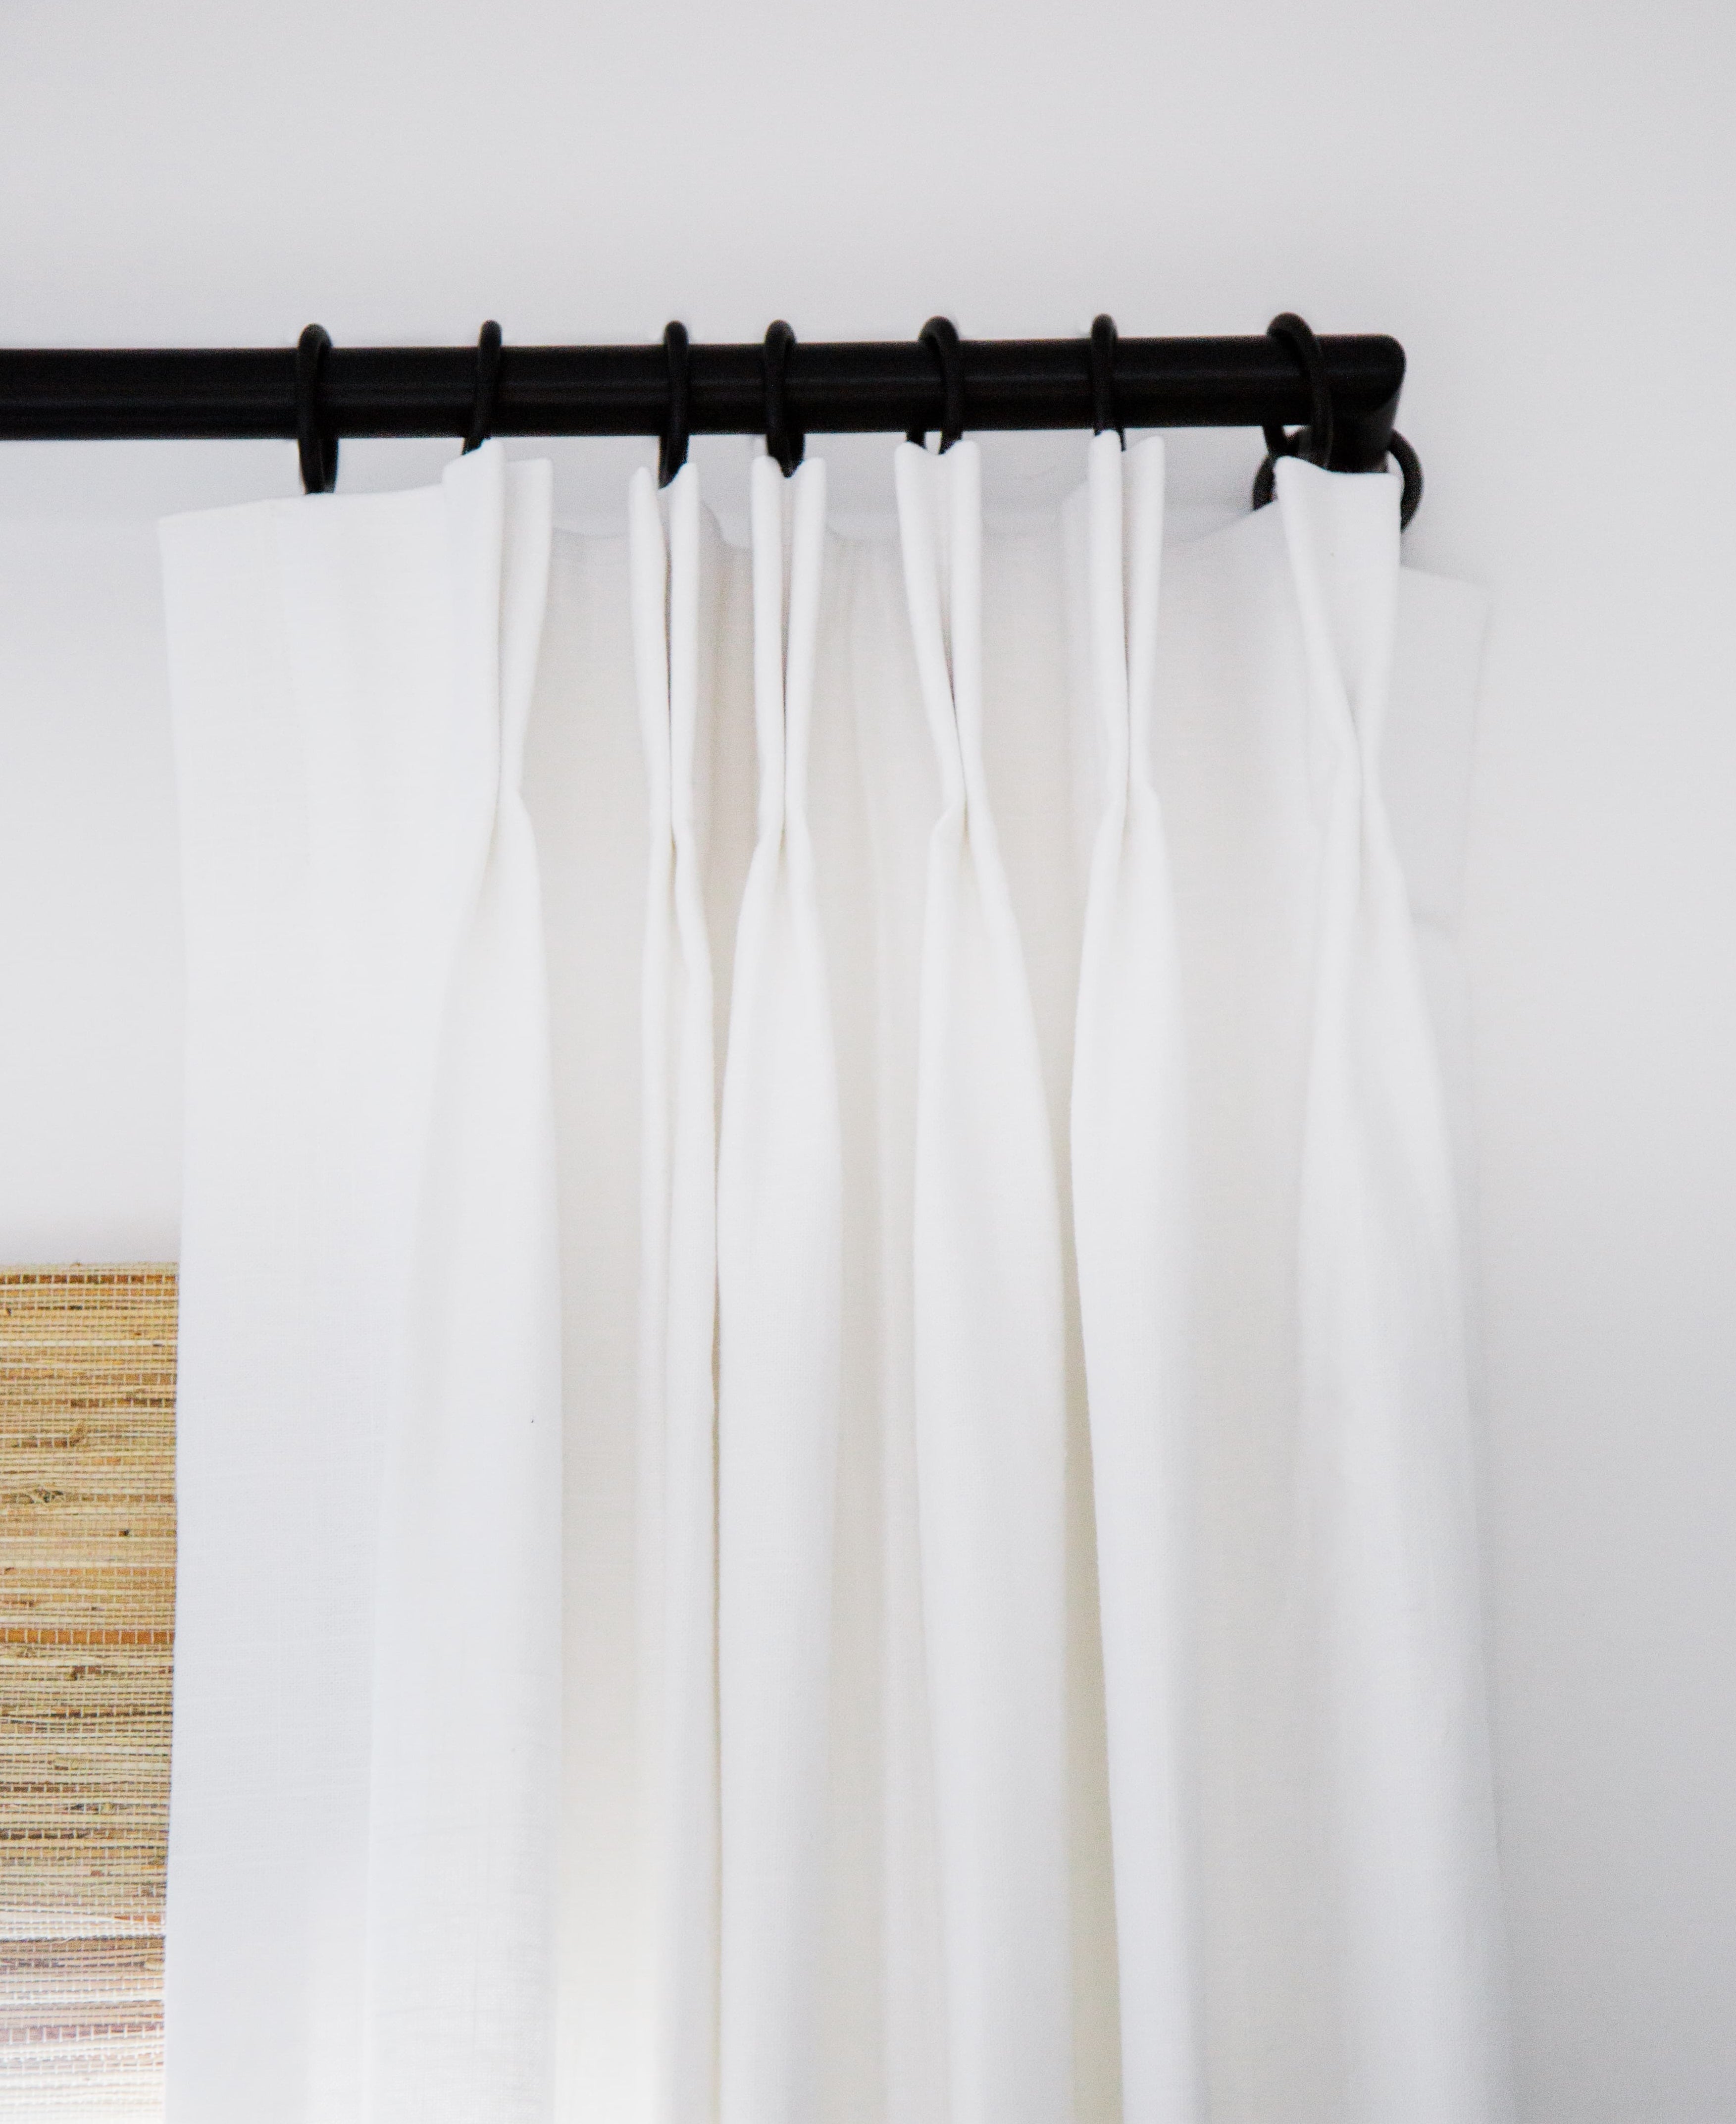
Three pinches at the top create soft, even fullness — traditional, considered, and timeless.
02 — Fabric & Color
Explore our designer-curated collections organized by hand, weave, and finish. See it in your space before you decide.
Linen Cotton — Everhem Essentials
7 fabrics
Moon
Bone
Sand
Birch
Ash
Sage
Rose
Linen — Everhem Hues
7 fabrics
Quartz
Driftwood
Flax
Granite
Umber
Cognac
Juniper
Jake Arnold for Everhem
11 fabrics
Manor Linen Gardenia
Windsor Diamond Magnolia
Herringbone Haze
Herringbone Saffron
Manor Linen Limestone
Manor Linen Mist
Manor Linen Citrine
Windsor Diamond Parchment
Magnolia Sheer
Parchment Sheer
Parlor Stripe Sheer
Carly Kuhn Collection
4 fabrics
Starry Moons
Winking Diamonds
Dainty Rose
Circus Circus
100% Cotton — Stripes
4 fabrics

Ivory

Oyster

Denim
03 — Lining
Lining determines how your drapery filters and blocks light. Choose based on the function of your space, how it's used, and the privacy you want.
The fabric on its own — light moves through and softens the room.
A privacy layer added behind the fabric — keeps shapes from being read through.
A room-darkening layer added behind the fabric — blocks light for sleep and media spaces.
04 — Sheers · optional
Sheers are ideal for rooms where you want to keep your drapes open to let the light in but still want some privacy. Add a second layer behind your drapery for double-layered light filtering.
Good to know
Sheers are an optional second layer for your drapery. You can skip this section if double-layered drapery isn't right for your space.
Soft, cool white — luminous in daylight.
Warm neutral — softens light without graying the room.
A deeper tone with subtle texture — more privacy when the drapes are open.
05 — Panel Configuration
Choose how your drapery is split across the rod. The right configuration depends on your window width, traffic flow, and the look you want when your drapes are open.
One panel that pulls fully to one side. Best for narrower windows or when you want the drapery to clear the window in one direction.
Two panels that meet in the center and open to either side — our most common configuration for windows and doors.
Two pairs across a wider opening — ideal for very wide windows, doorways, or full-wall applications.
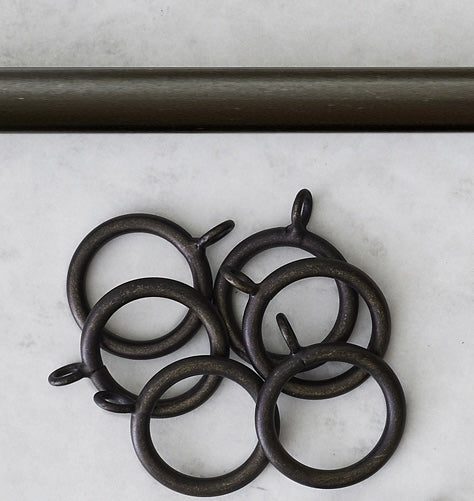
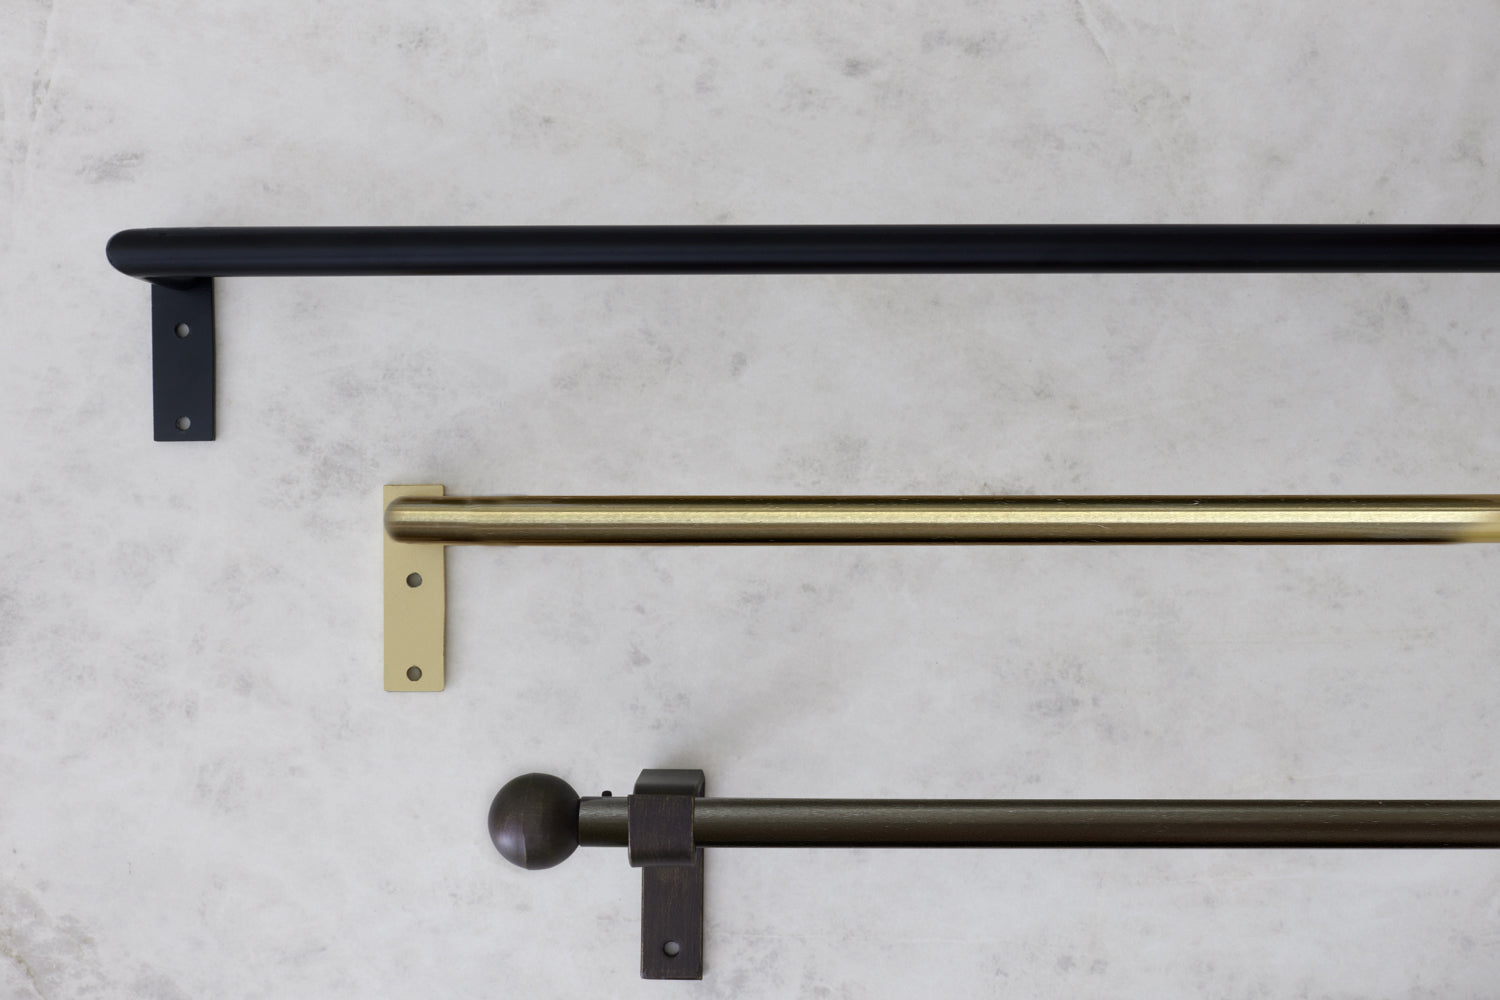
06 — Hardware
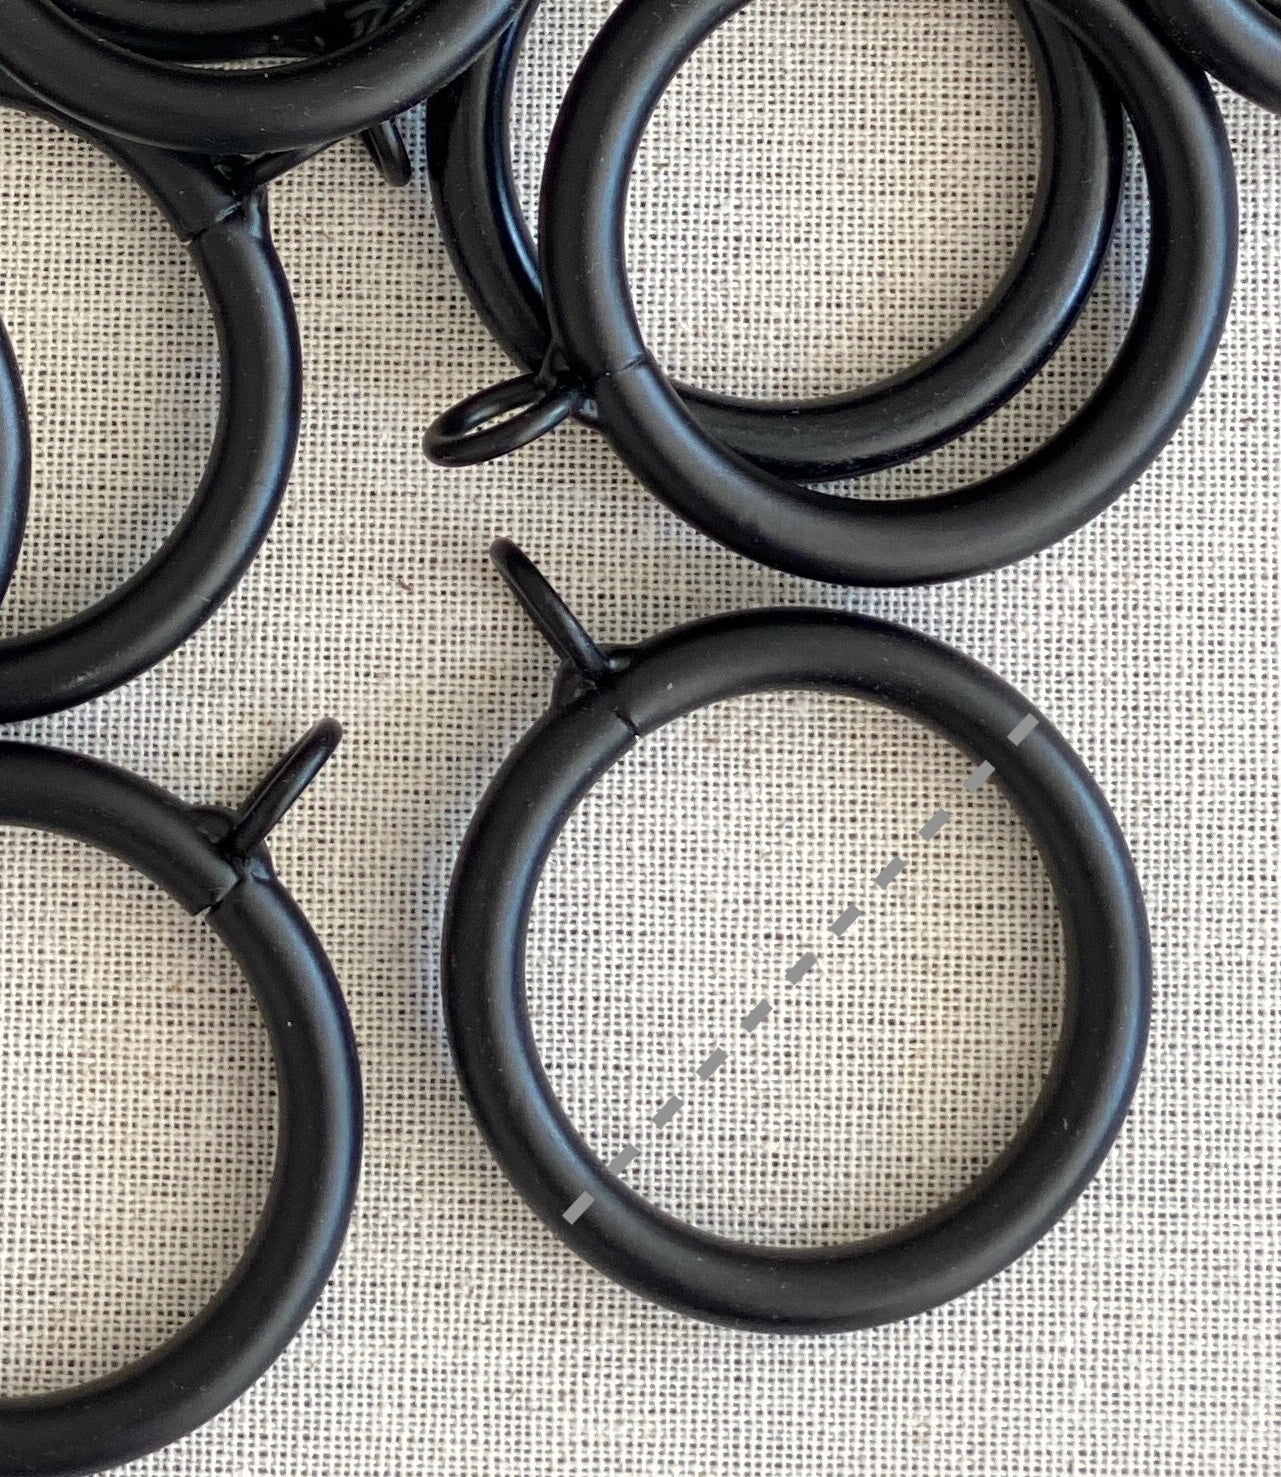
Three decisions in order — style, finish, and rod diameter. Hardware ships complete with rings and brackets included.
Step 1 · Style
Two return styles and one finial style — choose the silhouette that fits your room.
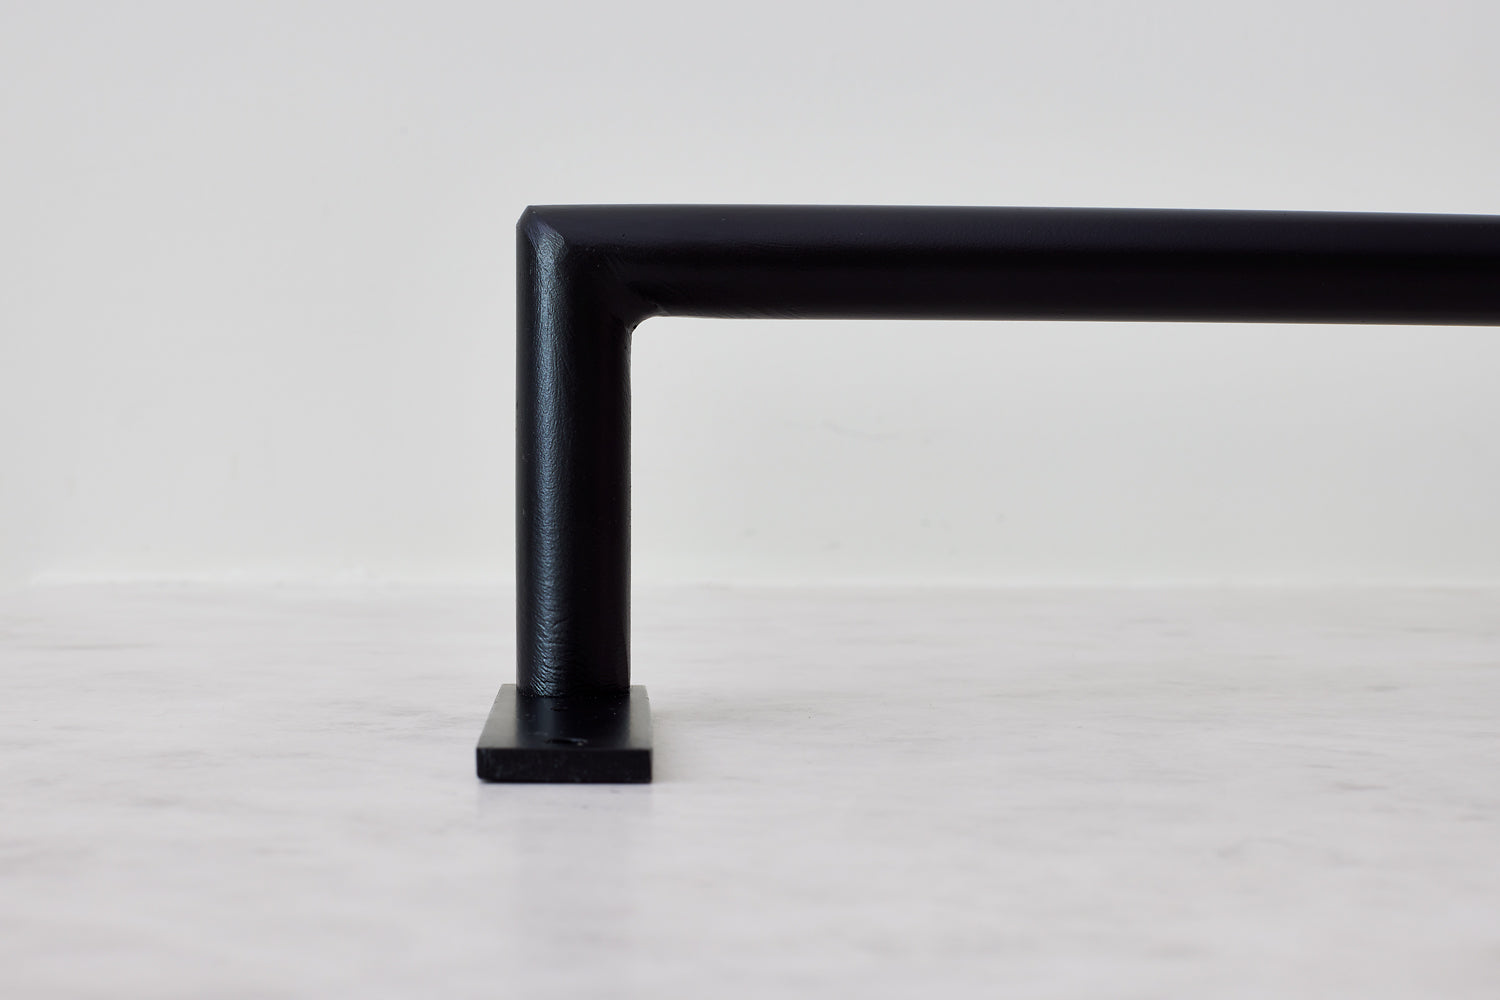
A clean 90° bend that returns the rod to the wall — minimal and architectural.
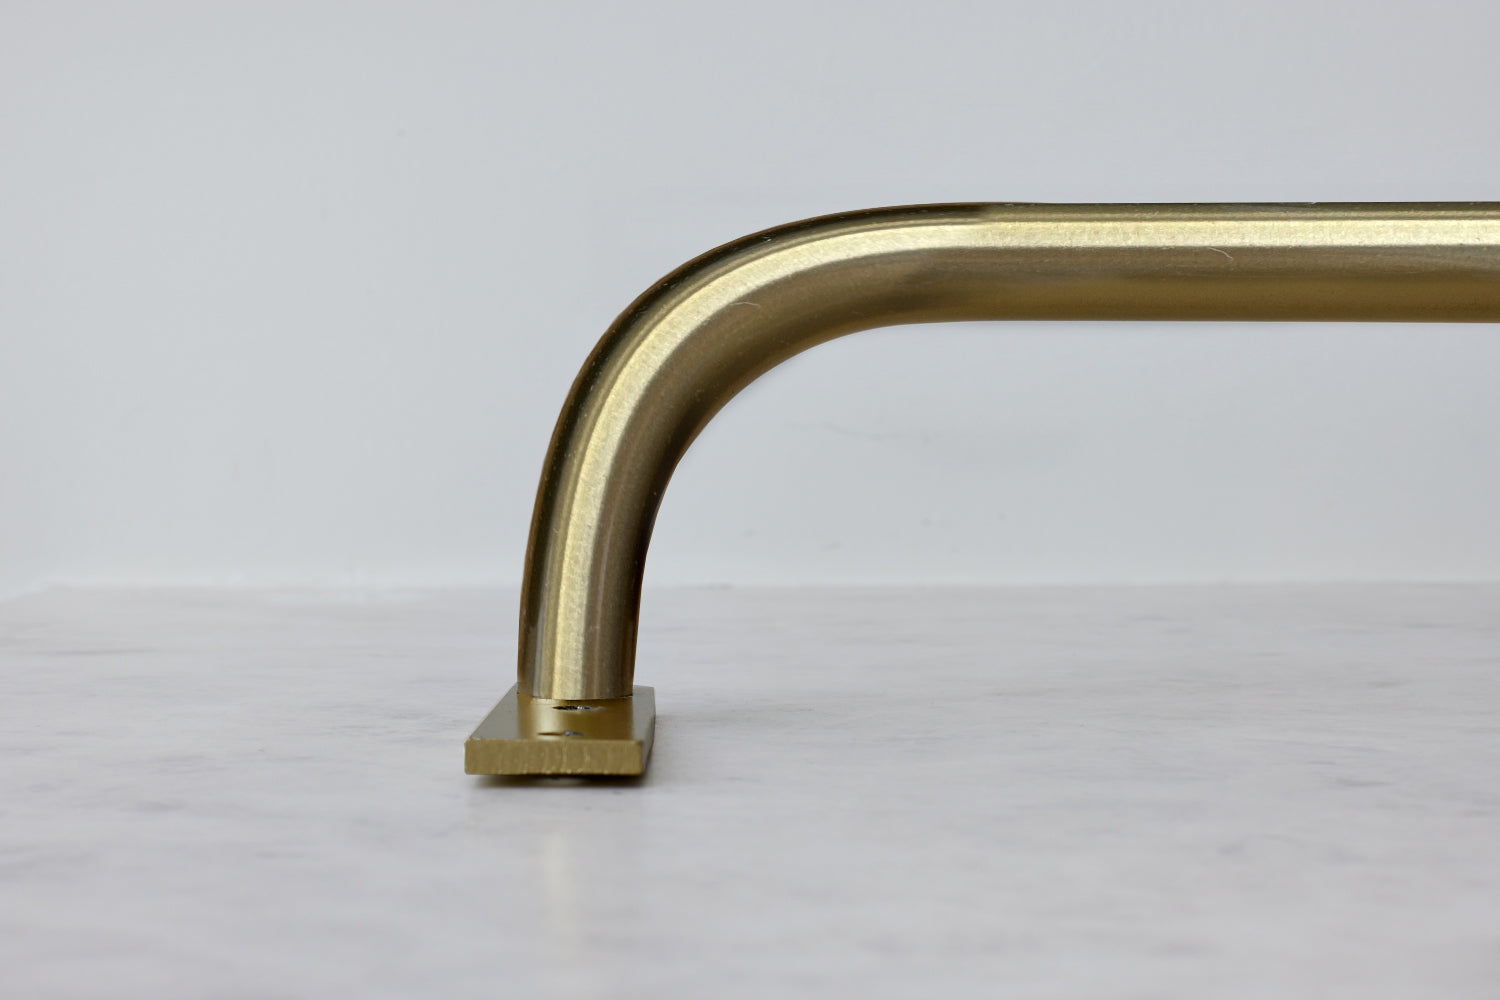
A soft, rounded return — gentler in profile and slightly more traditional.
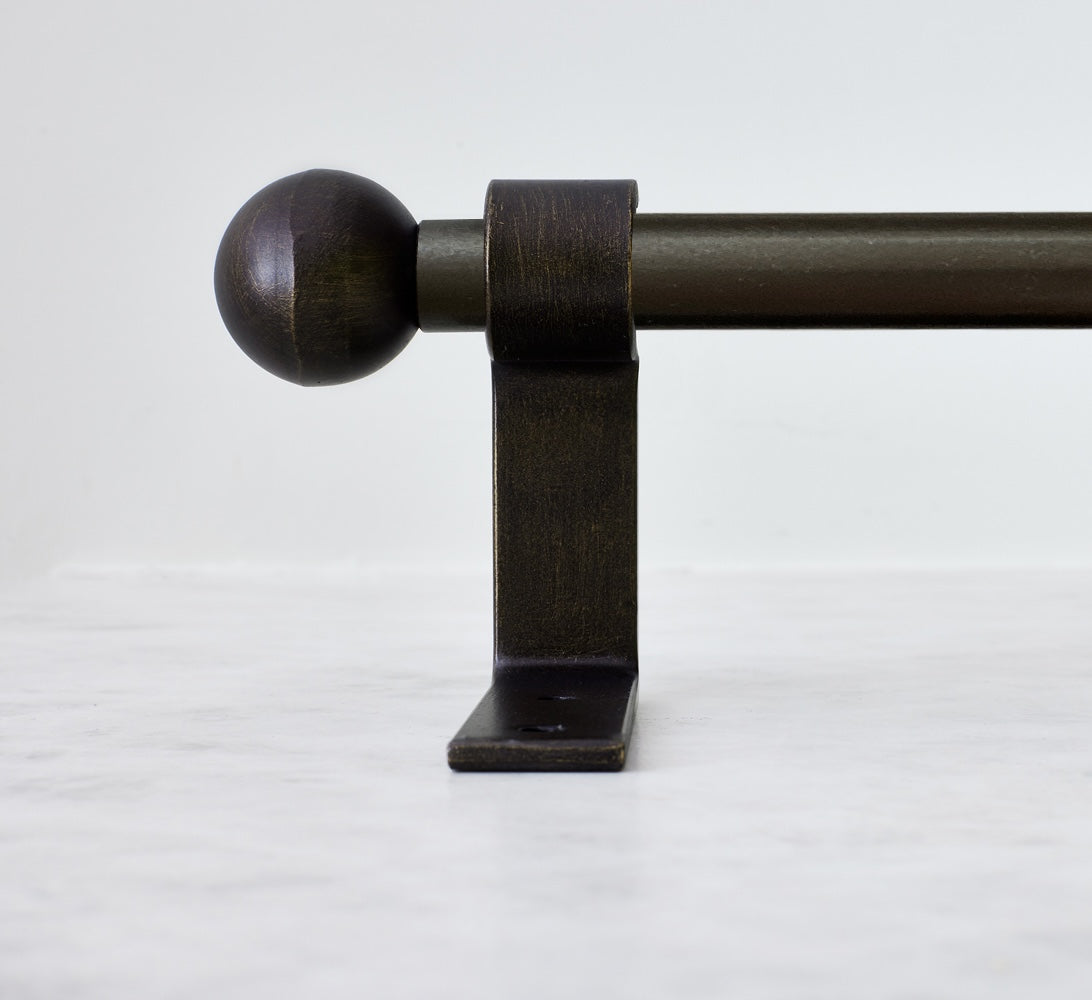
A turned ball at the end of the rod — classic, decorative, and finished.
Step 2 · Finish
All three finishes are solid metal — choose based on the warm or cool tones in your room.
Warm, golden — pairs with creams, woods, and warm whites.
Deep, rich brown — anchors a room with darker palettes or natural materials.
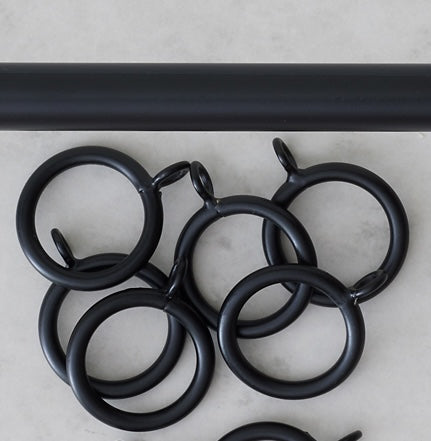
Crisp matte black — modern, graphic, and clean against light walls.
Step 3 · Rod Size
Choose the rod thickness that matches the visual weight of your drapery and room.

Slimmer profile — best for lighter fabrics and smaller-scale rooms.
Substantial profile — supports heavier fabrics and longer rod runs.
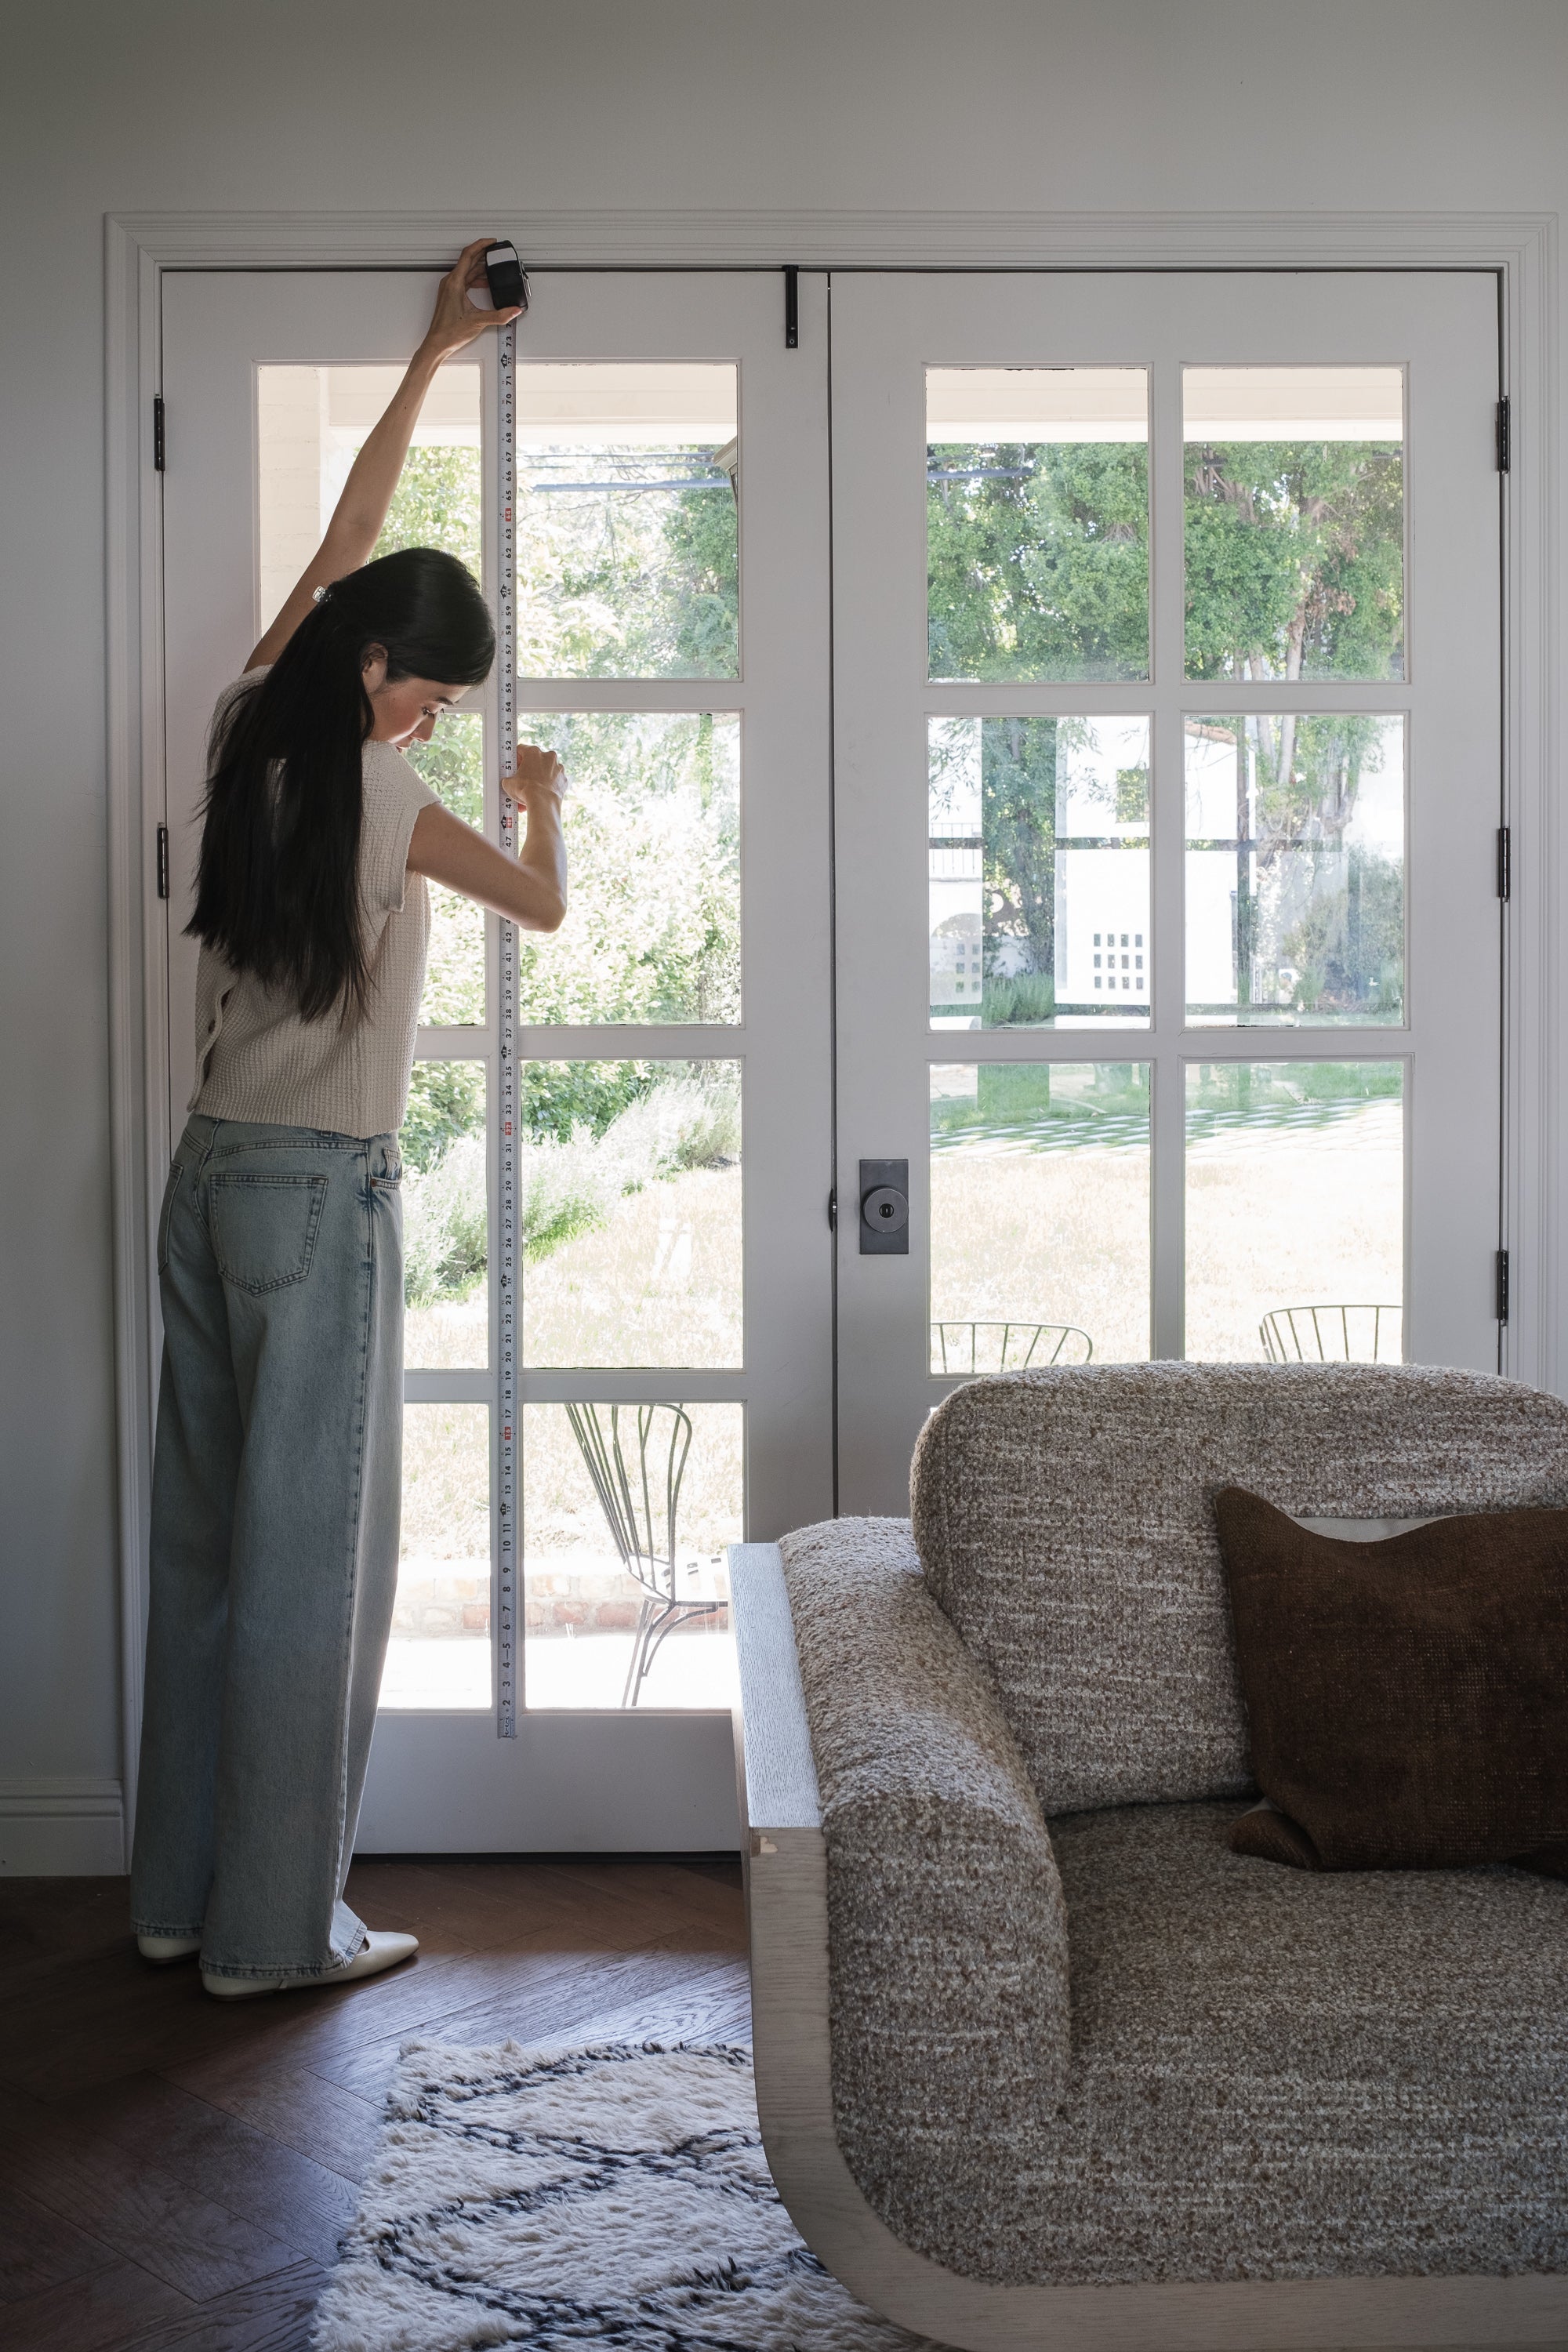
07 — How to Measure
A tape measure is all you need.
Pro note — your tape measure needs ⅛" tick marks visible.
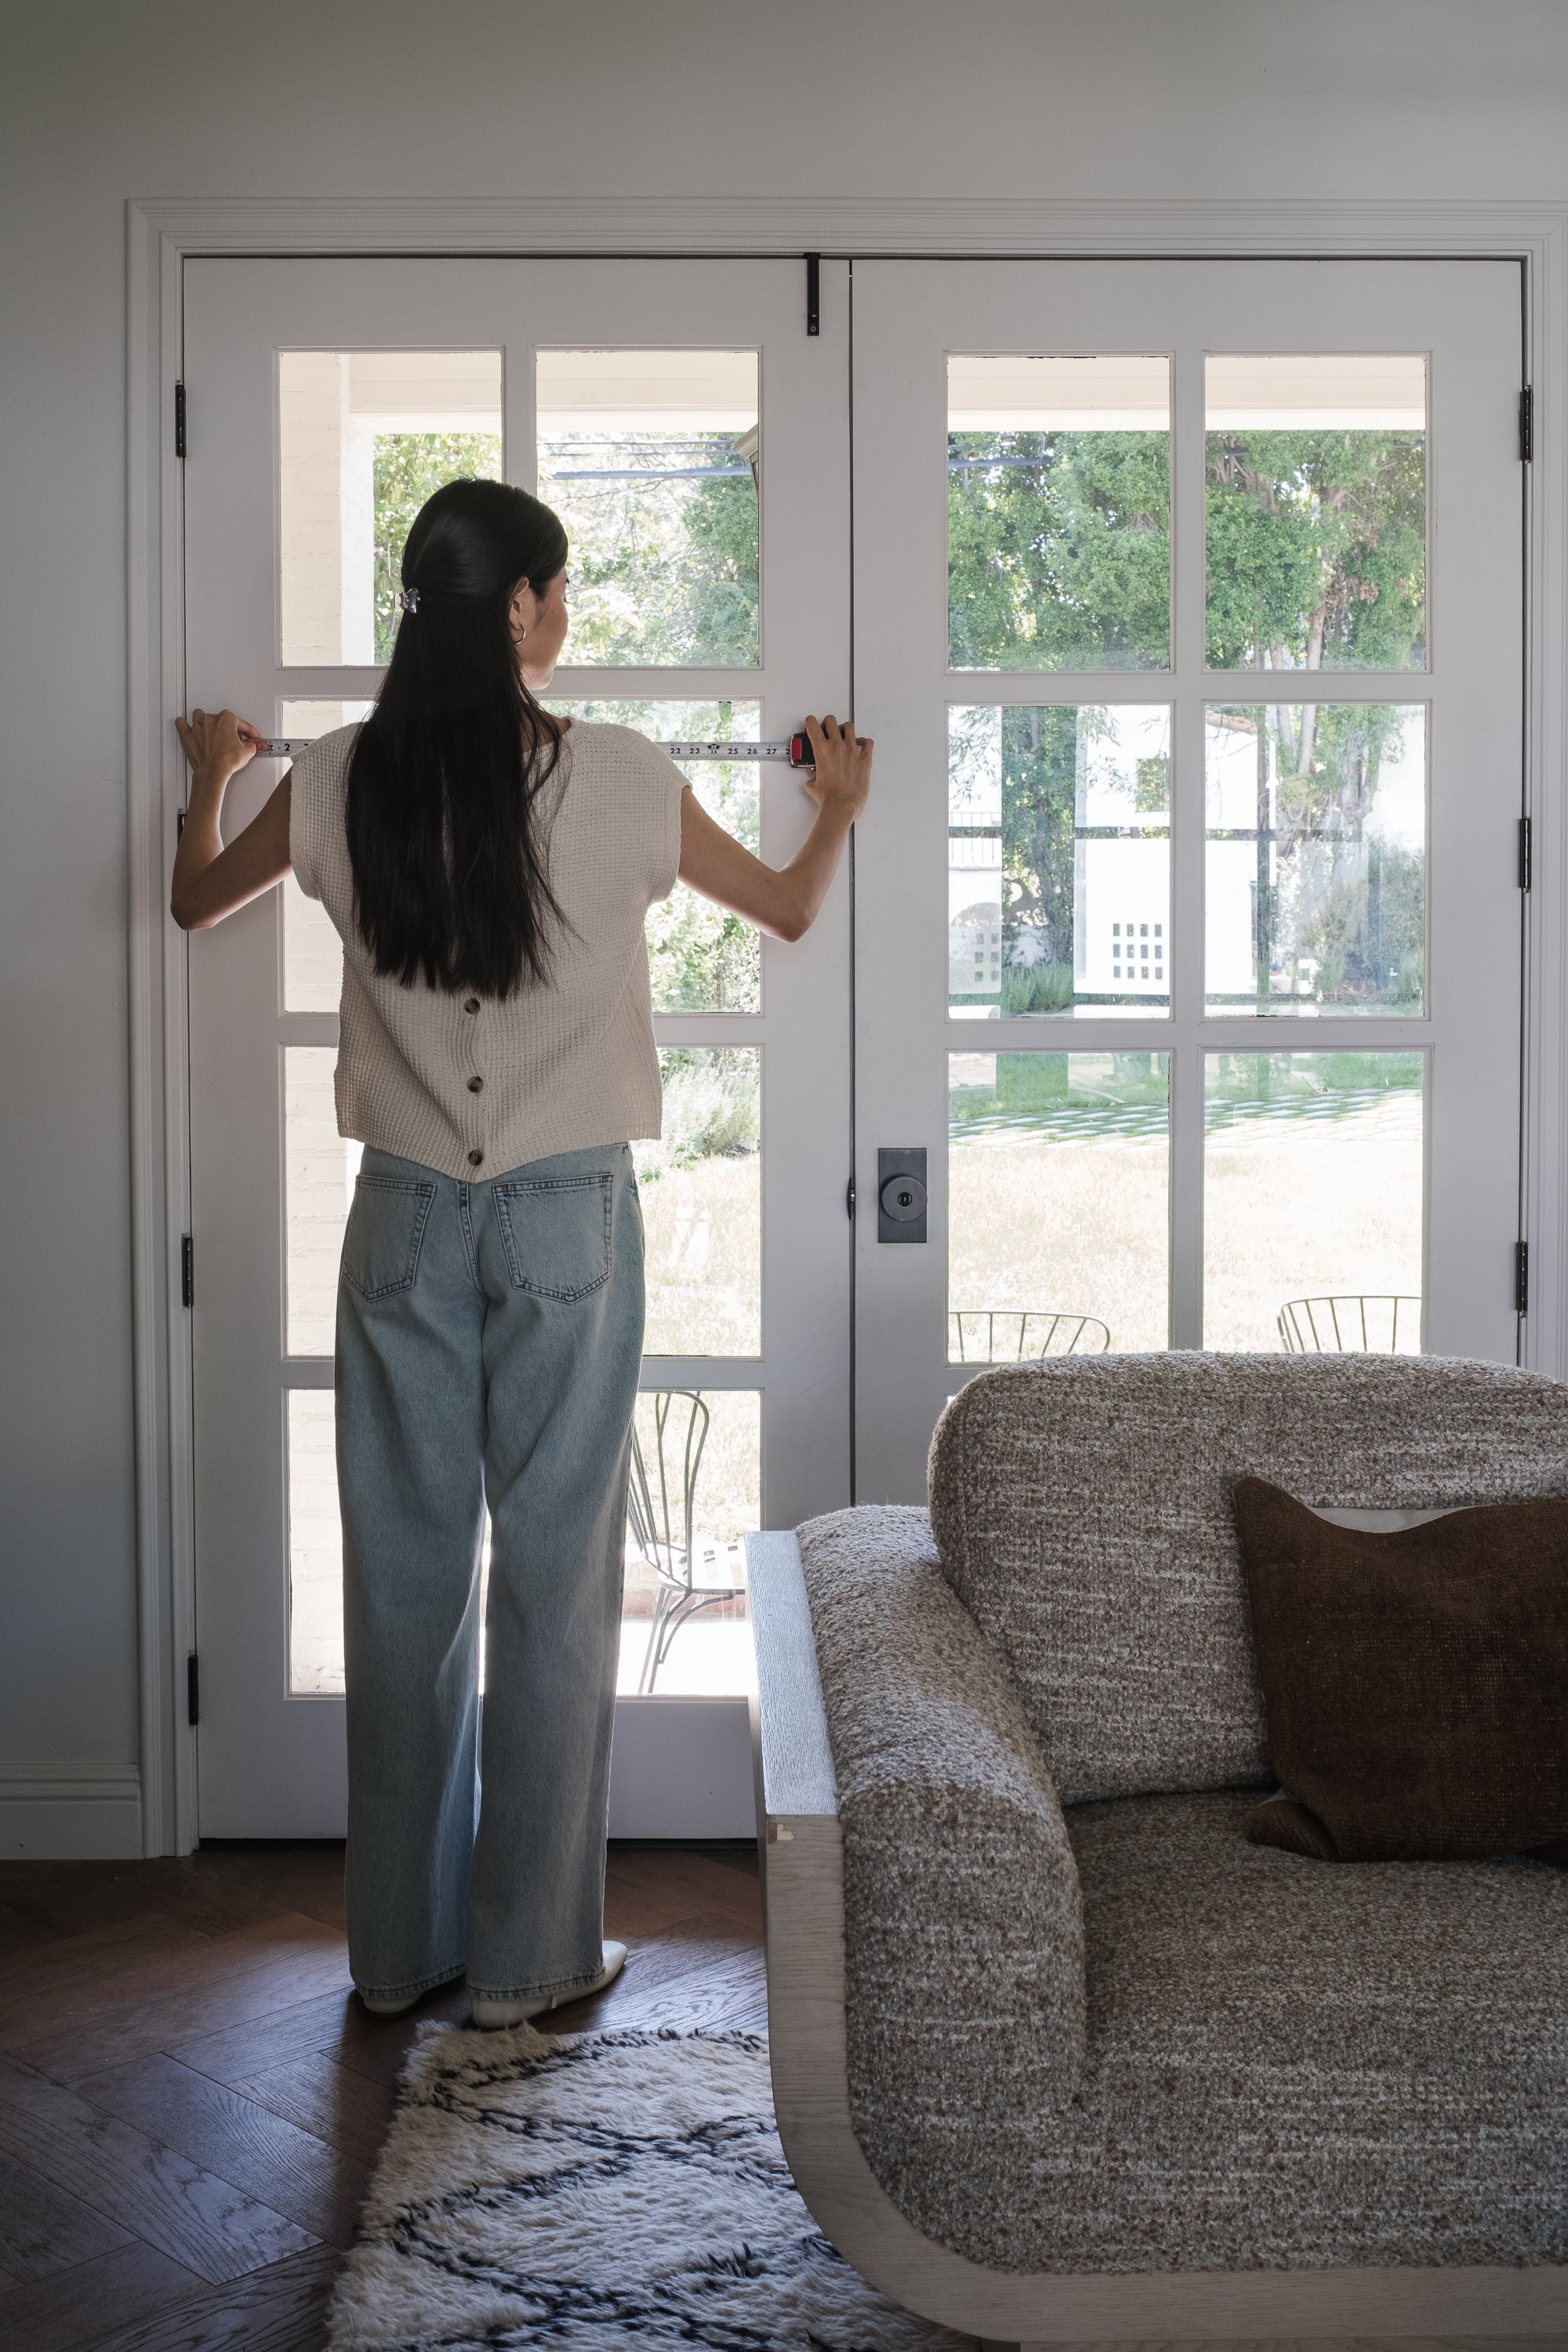
Determine the total width your drapery will cover — measure the window width, then the stack space on either side where your panels live when open.
Step 01
Measure outside edge to outside edge of the window in three places — top, middle, and bottom. Use the largest, rounded to the nearest ⅛".

Step 02
Measure the available wall space to the left of the window from the outside edge of the casing.
Step 03
Measure the available wall space to the right of the window from the outside edge of the casing.
Rule of thumb
Stack scales with the window — it's where your panels live when open, and it sets how the drapery reads against the wall.
Smaller window
10" per side is the sweet spot — enough to clear the glass when open without overpowering the wall.
Larger window
15"–24" per side for wide windows or rooms with generous wall space — the bigger stack gives the drapery presence and lets it fully clear large openings.
Measure floor-to-window first, then the available space above the window for your mount height.
Step 01
From the top of the window casing straight down to the floor. Measure left, center, and right — use the longest, rounded to the nearest ⅛".

Step 02
The distance from the top of the window to the rod. Use our rule of thumb below to pick the right height for the space above your window.
Rule of thumb
The right answer depends on how much space you have between the top of the window and the ceiling.
Small space
Mount 10" above the window — or 2" down from the ceiling, whichever is smaller. This is the right move for most standard rooms.
Large space
Mount halfway between the top of the window and the ceiling. With tall ceilings, splitting the difference reads more intentional than going either floor-to-ceiling or hugging the window.
08 — Other Configurations
Order drapery or hardware on its own. Here's how the steps from this guide still apply.
Drapery Only
You bring the hardware — we'll handle the panels.
How to measure

Step 01
Outside edge to outside edge of the window, in three places.
Step 02
Available wall space to the left and right of the window. Same 10" rule of thumb applies.

Step 03
This becomes the basis for your panel length.

Step 04
Same rule of thumb applies — see the Measure section above.
Step 05 — new
Subtract your ring OD from the mount height — this is your final panel length, so the drapery just kisses the floor.
A note on sheers
Sheers can't be self-selected with drapery-only — the construction needs to coordinate with your existing hardware. Reach out and we'll help you spec it.
Hardware Only
You bring the panels — we'll handle the rod, rings, and brackets.
How to measure
Step 01
The total span you'd like the rod to cover.
What's included
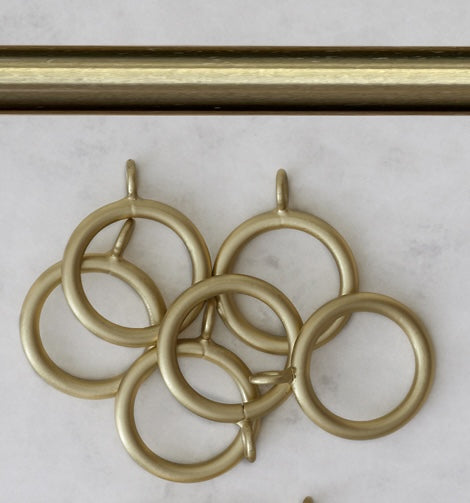
Every Everhem hardware order ships complete with the matching rings and brackets — no separate parts to source.
A note on rod length
Every Everhem rod is engineered around a pair of drapery. If you're sourcing a rod for a single panel and your total rod length is longer than 78", reach out — we'll quote a custom solution that handles the additional bypass.
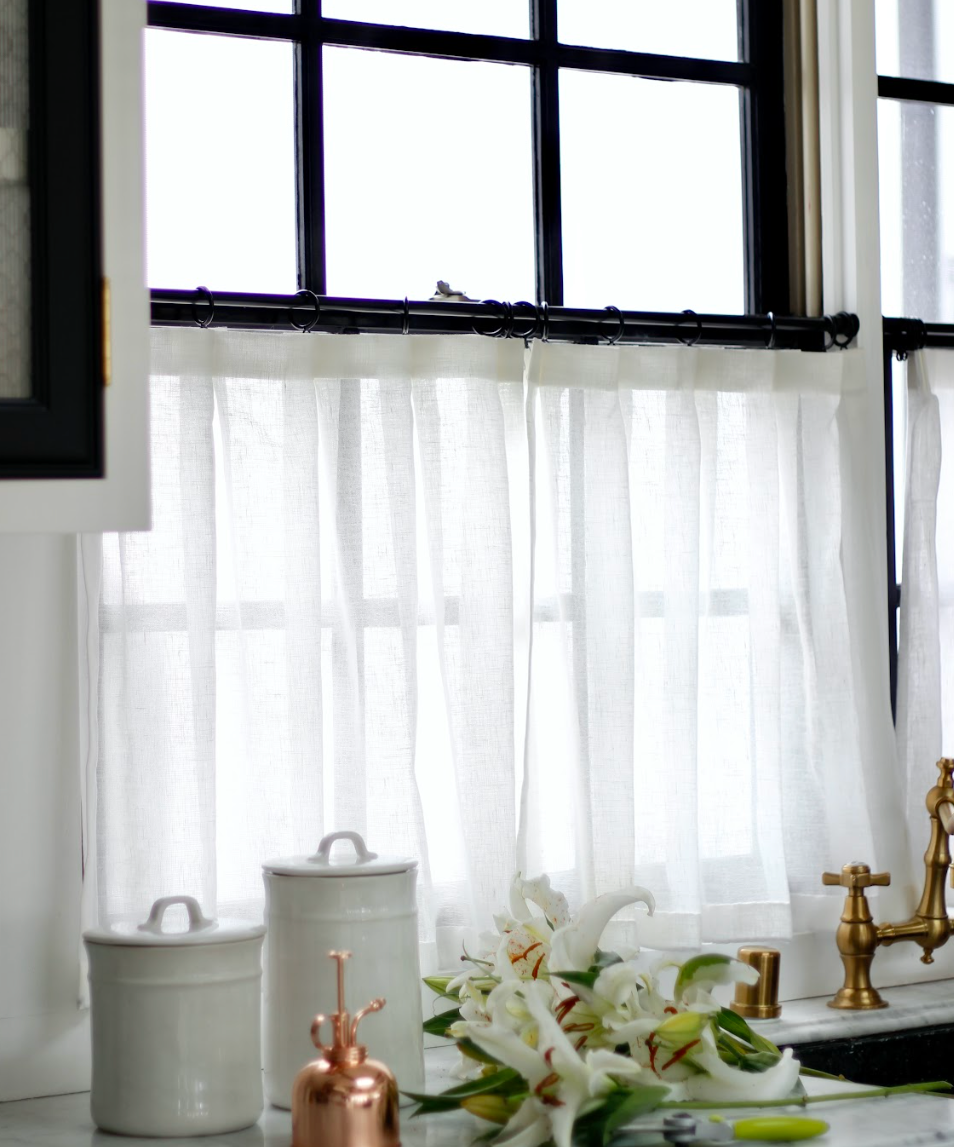
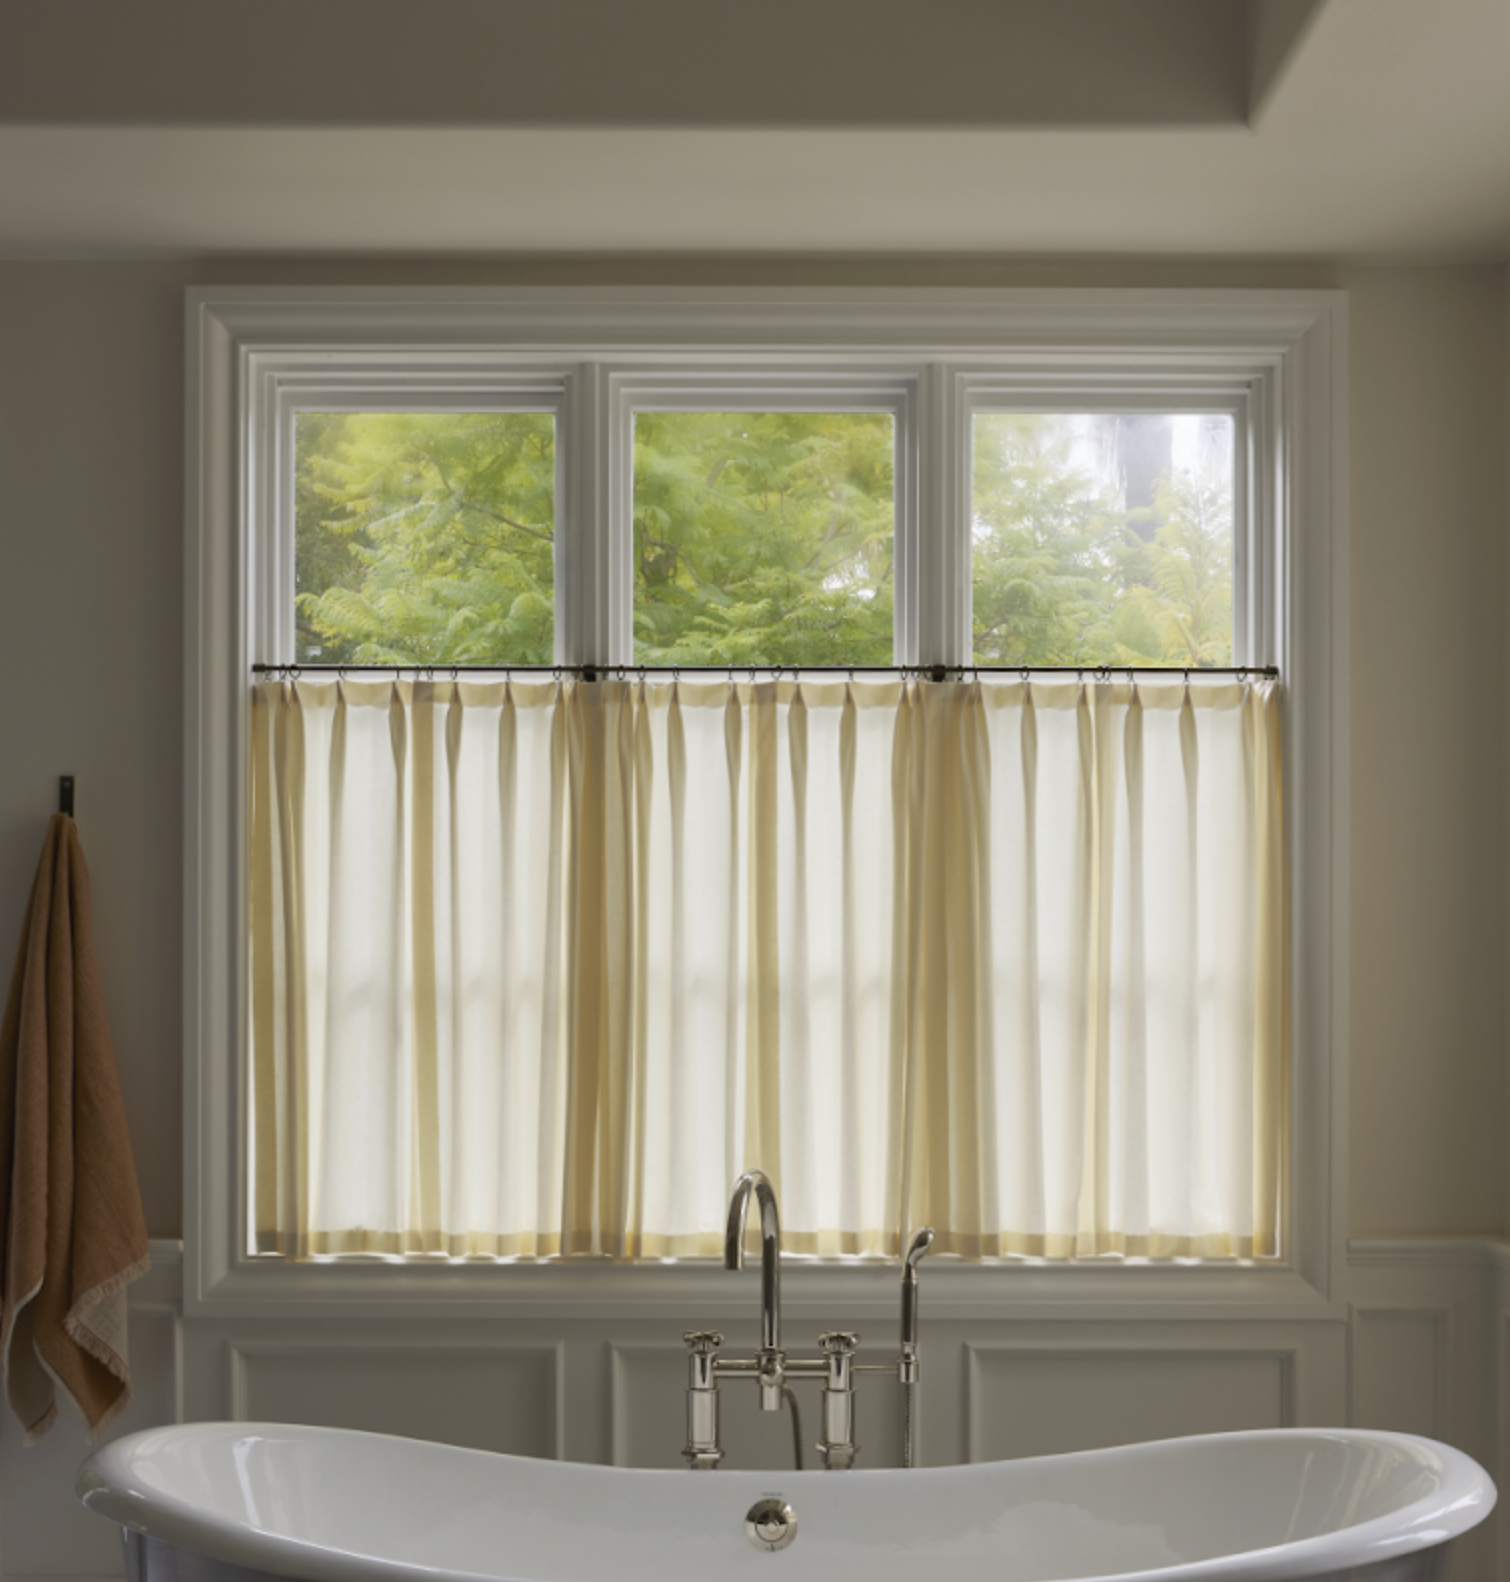
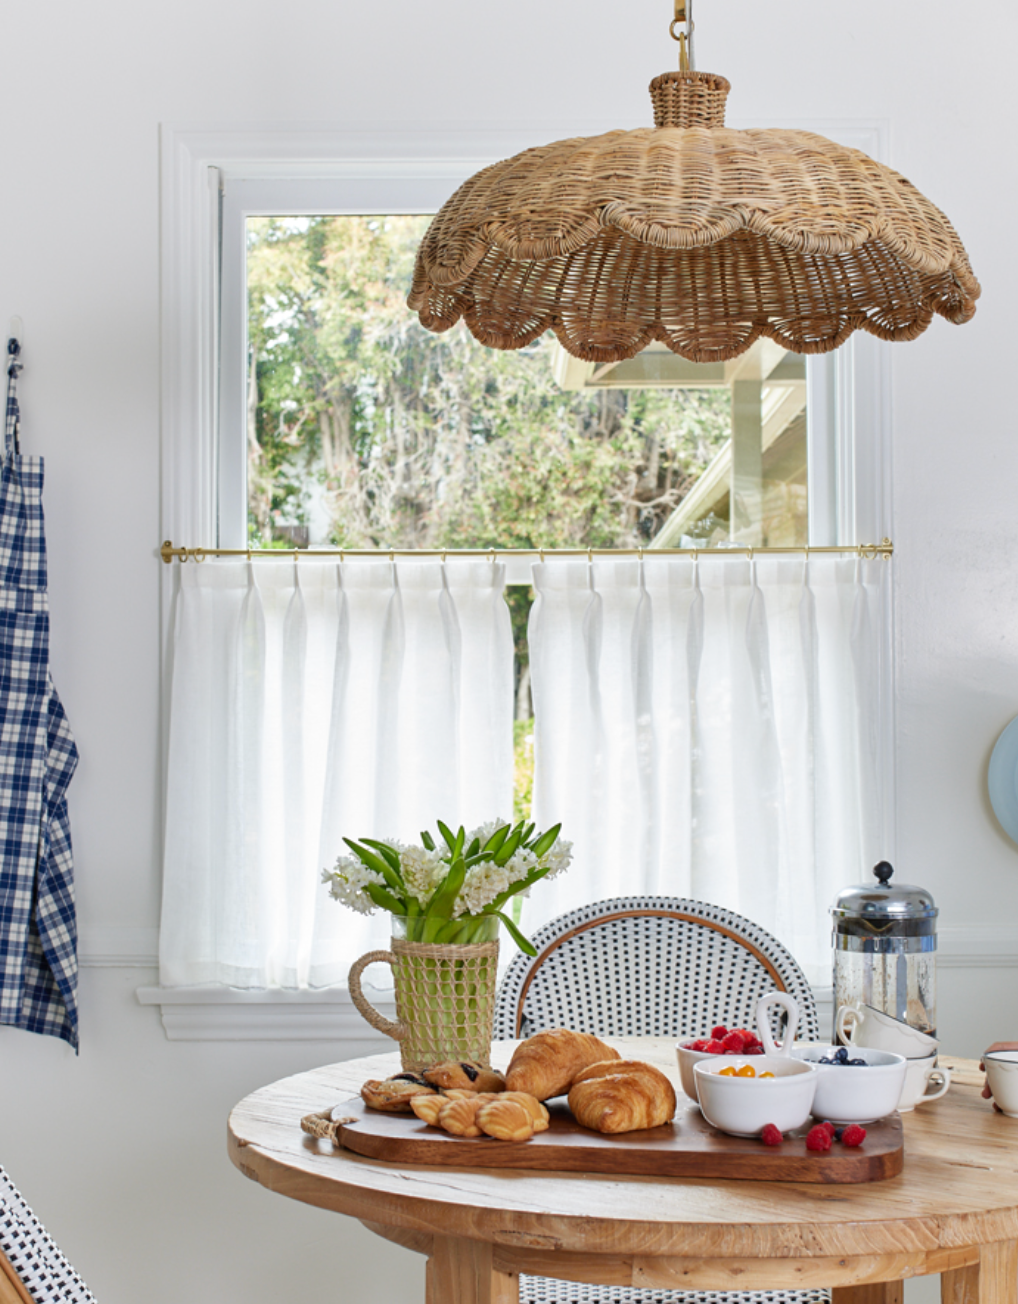
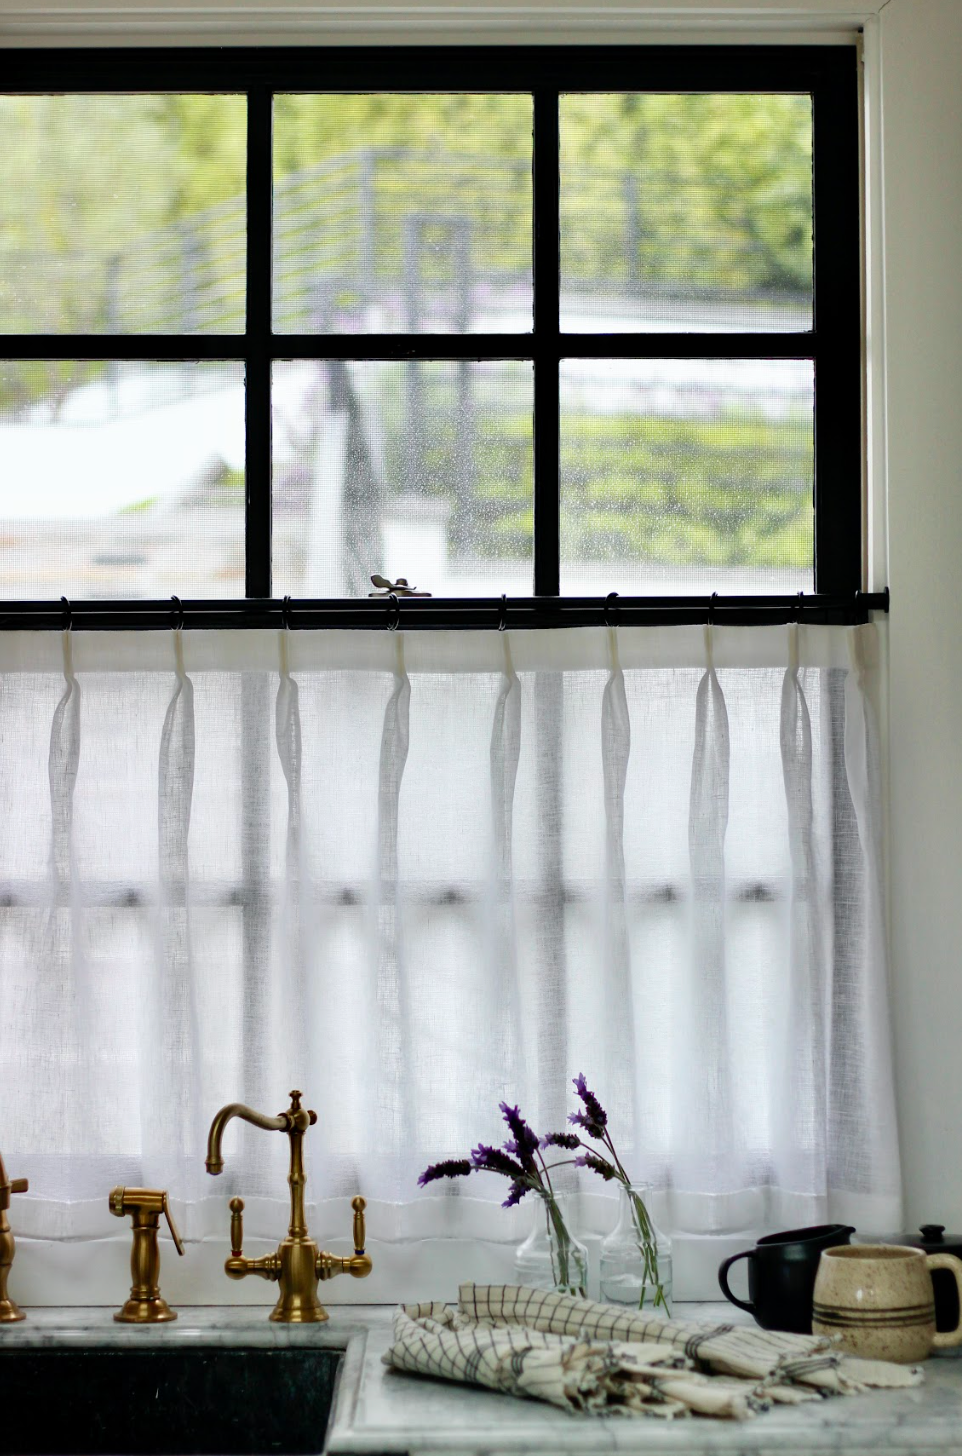
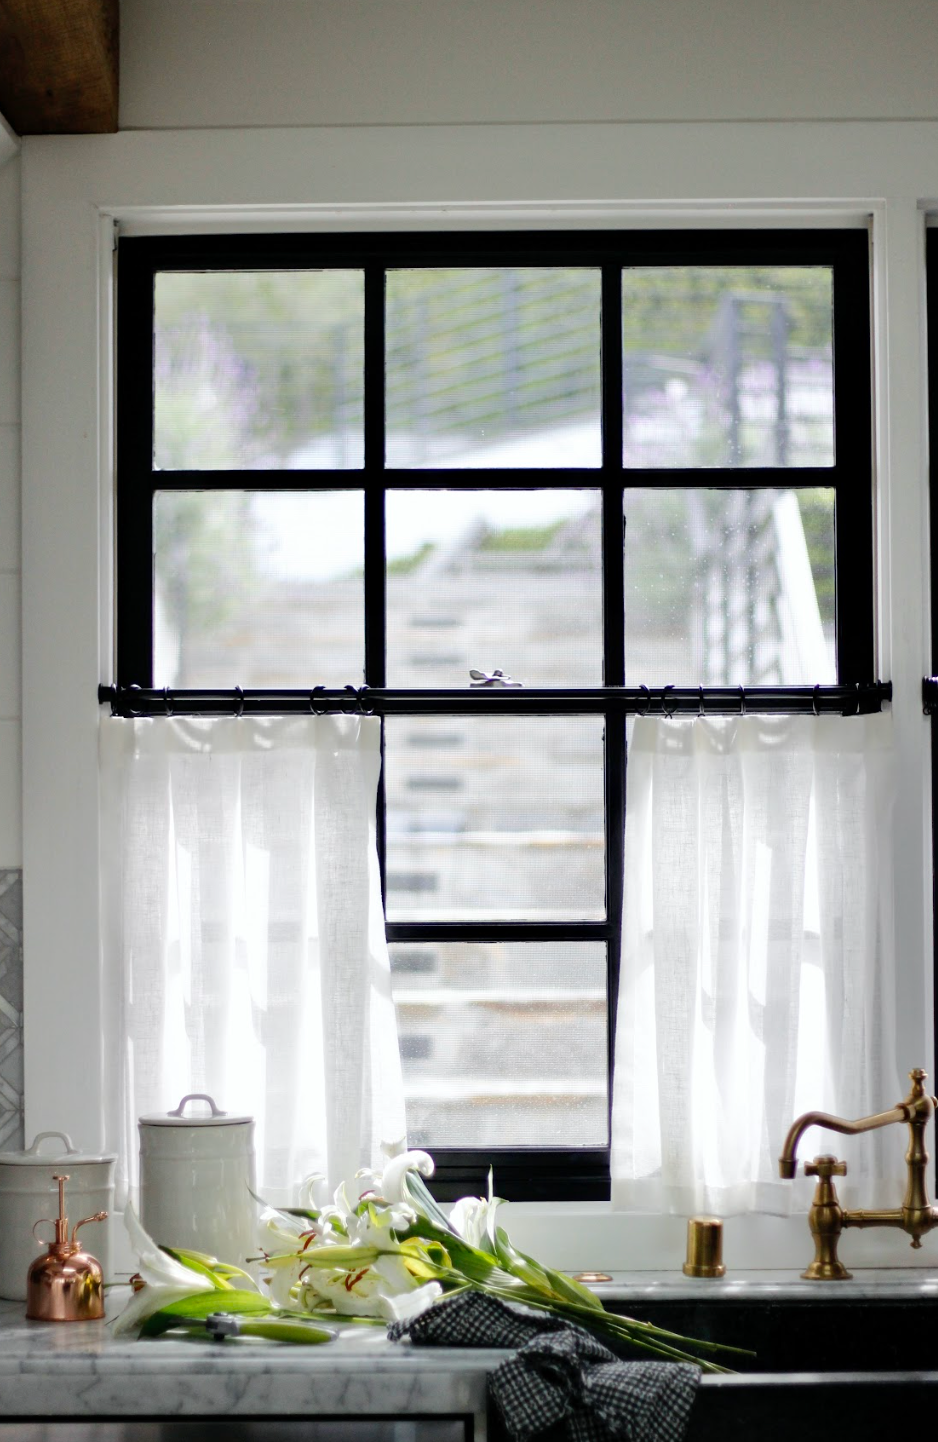
Your guide to café curtains — by Everhem experts
Half-coverage panels designed for spaces where you want privacy and light at the same time — kitchens, bathrooms, breakfast nooks. A walk-through of every decision that shapes a custom café curtain.

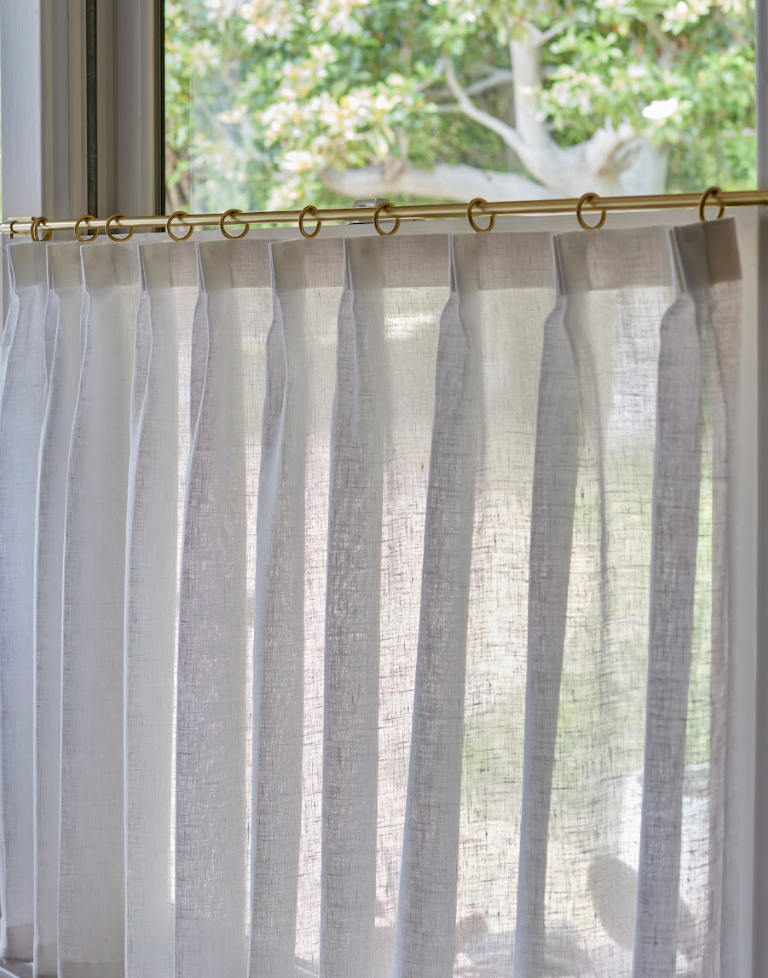
01 — Pleat Style
Choose the silhouette that suits the room.
Crisp, structured folds with flat fronts. Tailored, architectural, and quietly graphic.
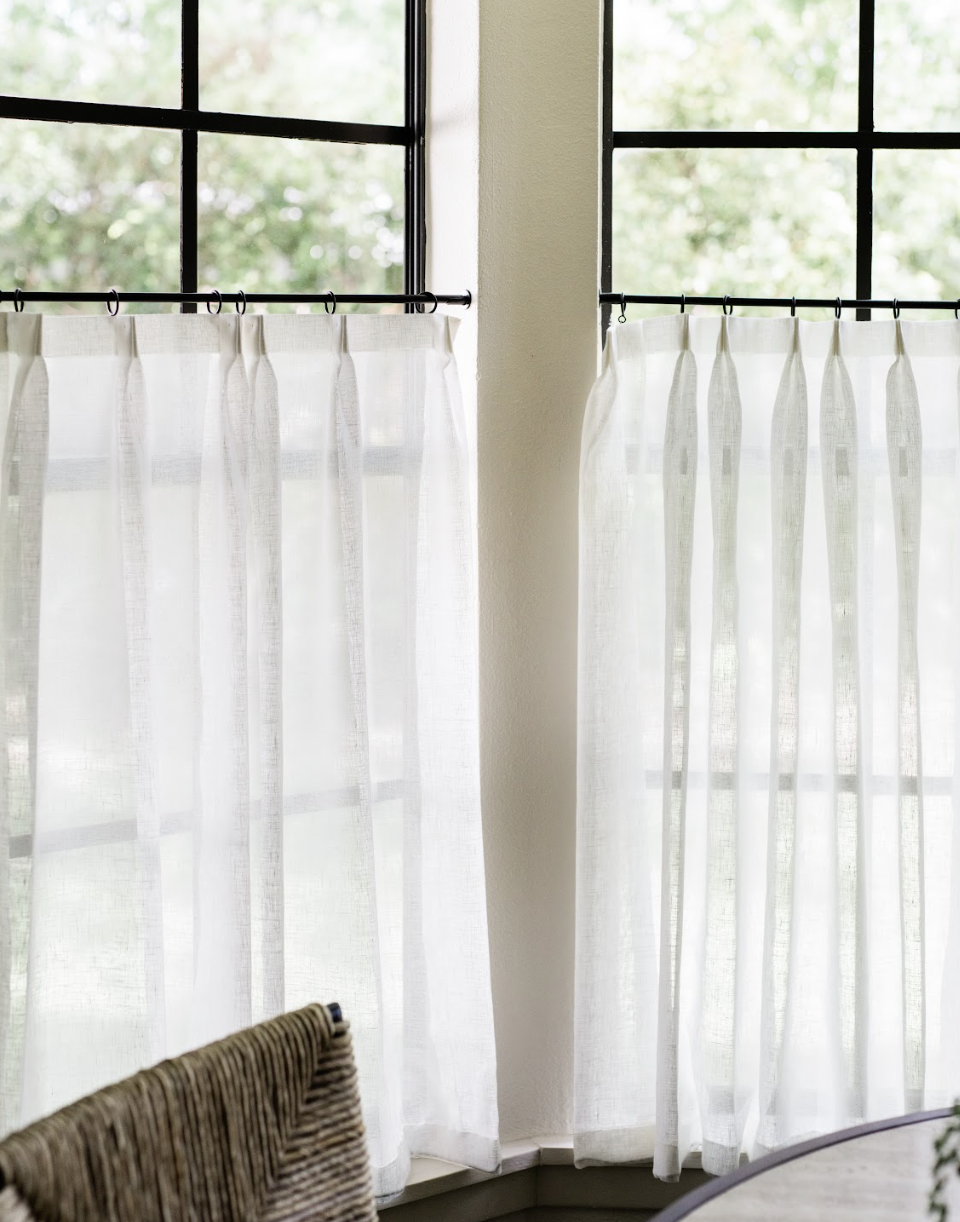
A clean, modern fold — flat at the top with subtle rolling fullness below. Classic restraint.

Three pinches at the top create soft, even fullness — traditional, considered, and timeless.
02 — Fabric & Color
Designer-curated for café curtain application — lightweight fabrics that suit smaller-scale window treatment.
Linen — Everhem Hues
7 fabrics
Quartz
Driftwood
Flax
Granite
Umber
Cognac
Juniper
Sheers
3 fabrics
Moon
Bone
Pebble
Carly Kuhn Collection
4 fabrics
Starry Moons
Winking Diamonds
Dainty Rose
Circus Circus
Jake Arnold for Everhem
11 fabrics
Manor Linen Gardenia
Windsor Diamond Magnolia
Herringbone Haze
Herringbone Saffron
Manor Linen Limestone
Manor Linen Mist
Manor Linen Citrine
Windsor Diamond Parchment
Magnolia Sheer
Parchment Sheer
Parlor Stripe Sheer
03 — Lining
Café curtains are designed for half-coverage — so the lining decision is already made for you.
They offer a subtle sense of privacy while letting light pour into the room.
04 — Hardware Finish
All three finishes are solid metal — choose based on the warm or cool tones in your room.
Warm, golden — pairs with creams, woods, and warm whites.
Deep, rich brown — anchors a room with darker palettes or natural materials.
Crisp matte black — modern, graphic, and clean against light walls.

Rod size · fixed
3/8" diameter rod
All café curtain rods come in a single 3/8" diameter — the slimmer profile suits the smaller scale of half-window panels. No selection required.
05 — Mount Position
Where the rod lives on your window.
The rod installs inside the window casement, recessed into the frame for a clean, built-in look.
Best for: trim you want to show, deeper windows, architectural moments.
Depth requirement
3/4" minimum
You need 3/4" of depth on the inside of the window casement to install a café curtain rod. Measure the available depth before choosing inside mount.
The rod installs on the face of the window trim — a softer profile that works when inside depth isn't available.
Best for: shallow windows, narrow casements, or any window where you can't recess hardware.
Flat space requirement
3/4" minimum
You need 3/4" of flat mounting space on the face of the window trim. Measure the available flat surface before choosing outside mount.
06 — Panel Style
Choose how your café curtain is split across the rod.
One panel that pulls fully to one side — a tidier silhouette for narrower windows.
Two panels that meet in the center and open to either side — our most common configuration.
07 — How to Measure
A tape measure is all you need. The measurements are the same for inside or outside mount — the only difference is where the rod lands.
Pro note — your tape measure needs ⅛" tick marks visible.
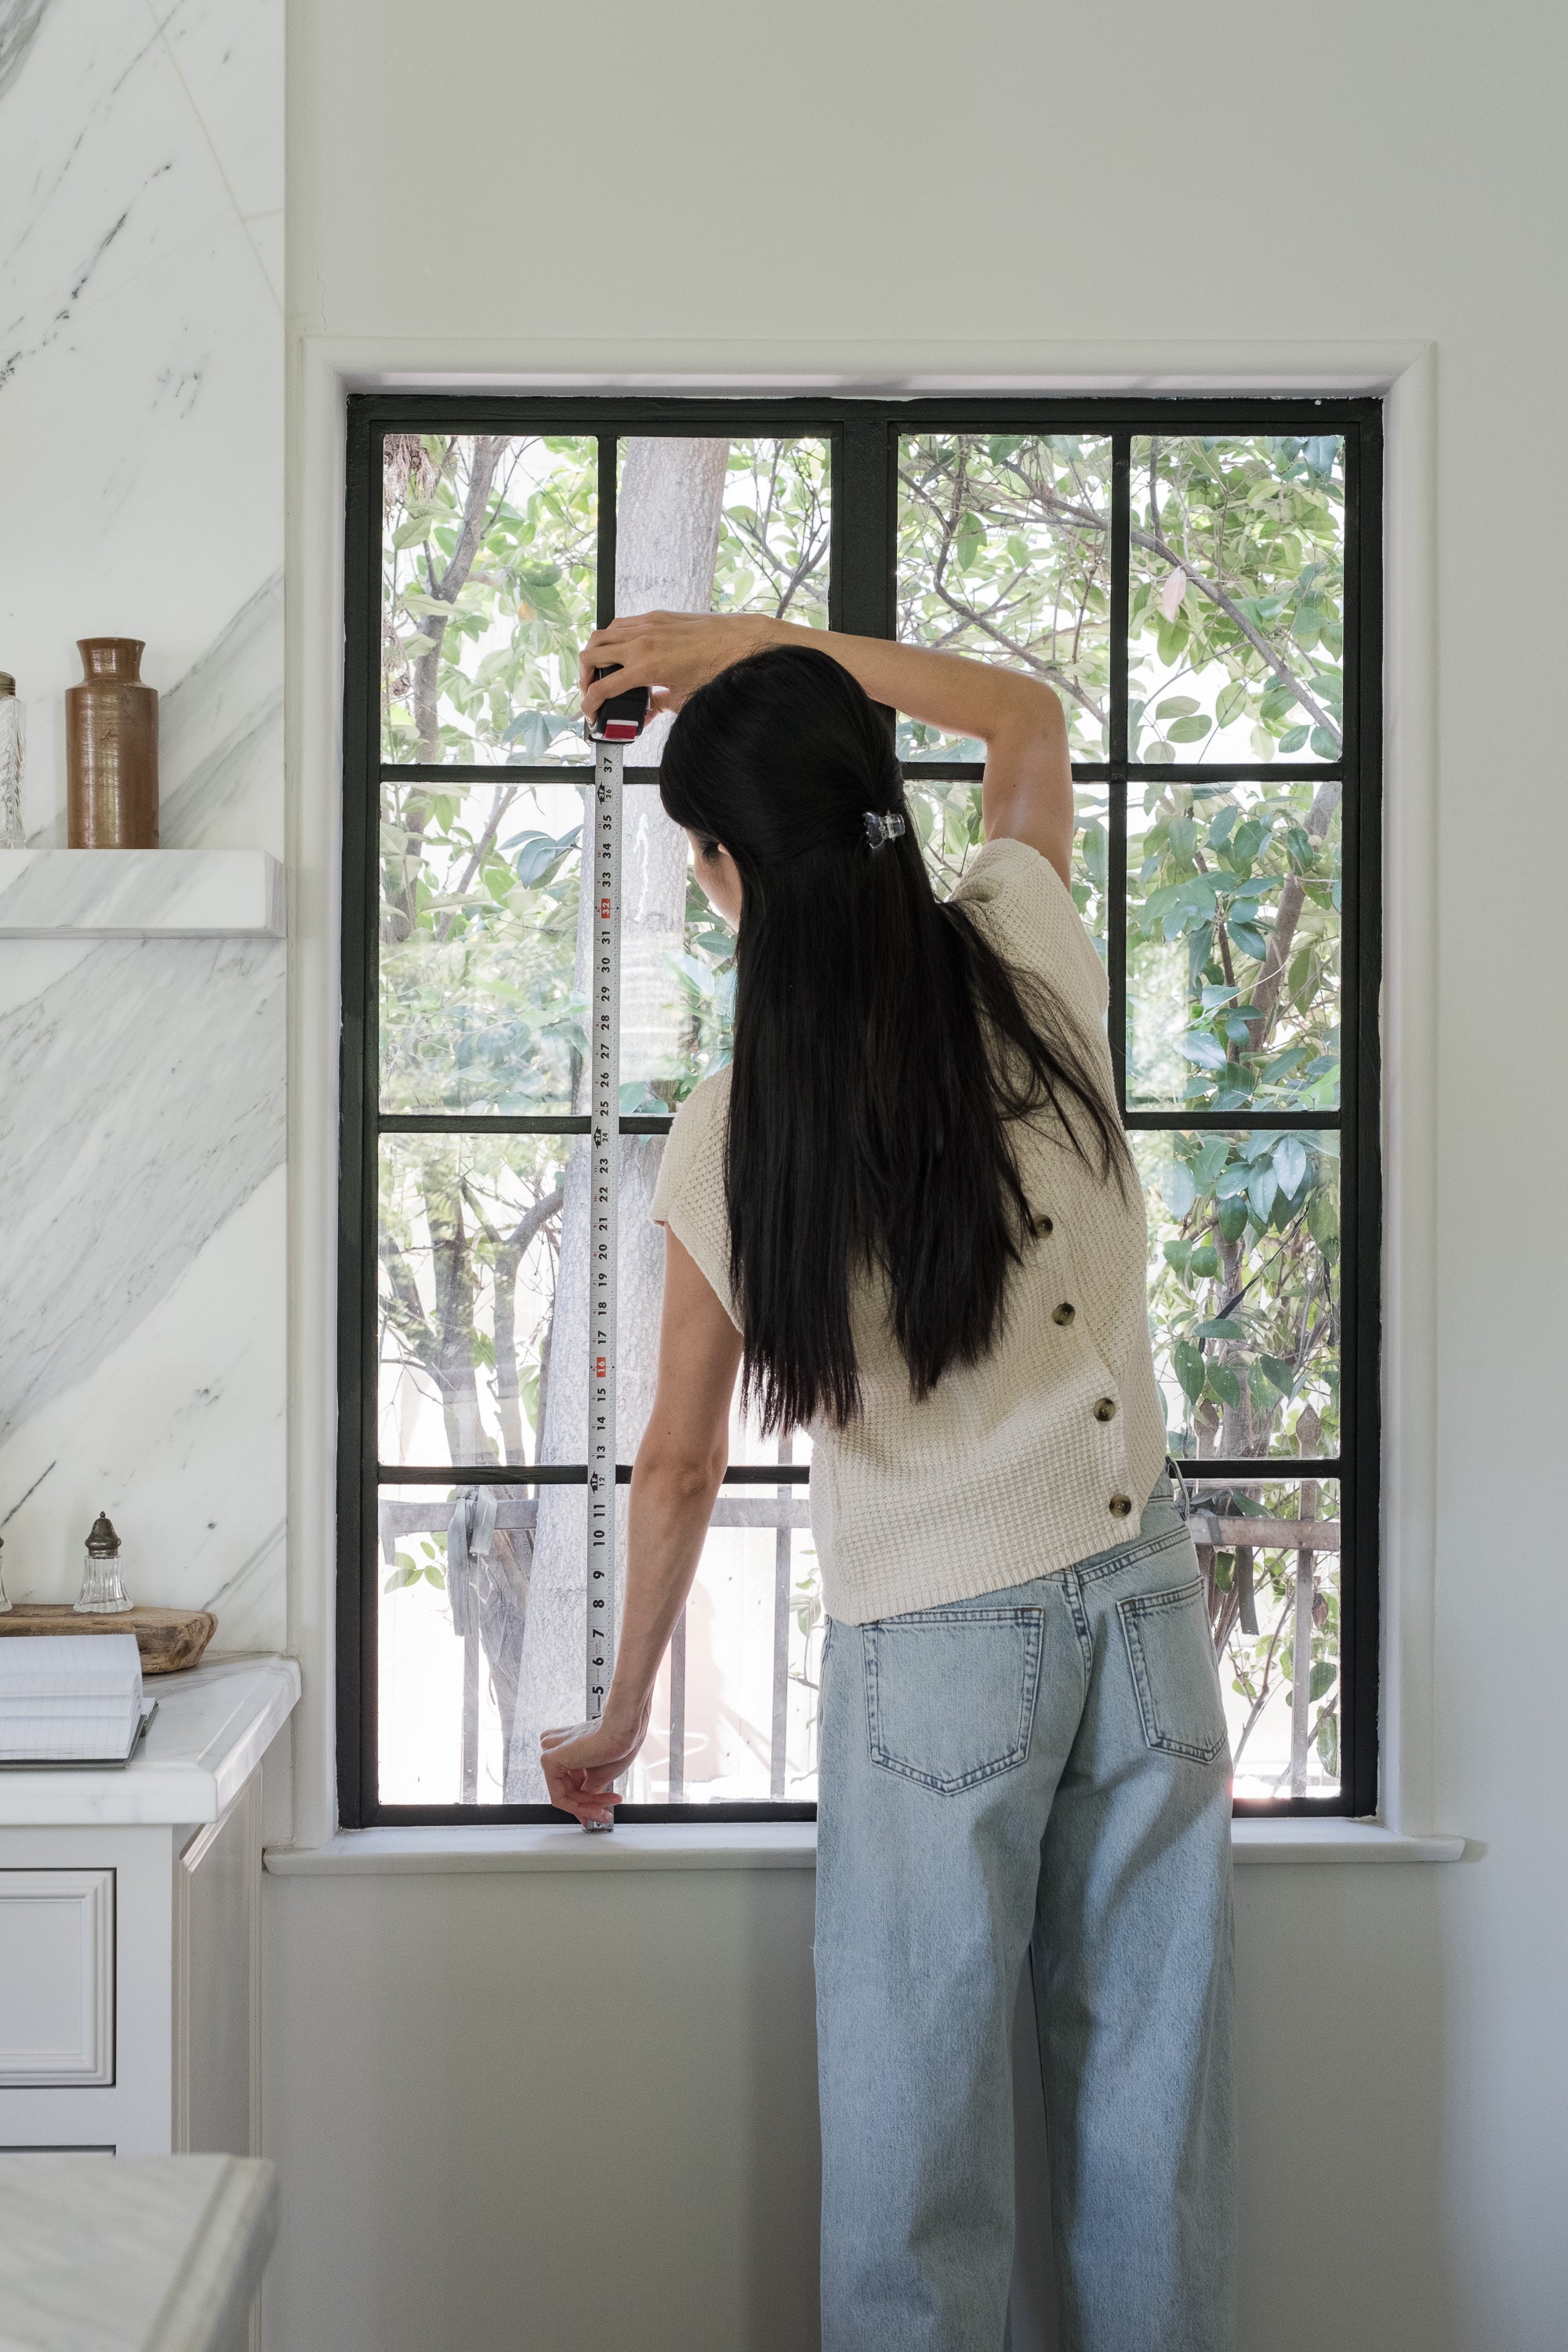
Decide where the rod will land — we recommend roughly the vertical halfway point of your window. Mark a level line across; this is your reference for everything else.

Measure horizontally along the mount line, end to end of where the rod will cover. Round down to the nearest ⅛".
Rule of thumb
Two scenarios — pick the one that fits your window.
No grid lines
Mount at roughly the vertical halfway point — measure your window's height, divide by two, and use that as your rod line.
Window has grid lines
Pick the grid line nearest the halfway point and mount along it. The rod reading flush with the muntin looks cleaner than splitting a pane.
Other Configurations
Already have hardware, or already have curtains? Order each on its own — here's how the steps from this guide still apply.
Café Curtains Only
We'll handle the panels. The two measurements above are exactly what you'll provide — no deductions or extra steps.
Hardware Only
We'll handle the rod, rings, and brackets. Just choose your total rod length — that's the only measurement that applies.
Your guide to fixed curtains — by Everhem experts
A stationary silhouette that can be styled flat for a clean architectural look or full for a softer, more traditional effect. Ideal for petite windows and doors — privacy with an airy, light-filtering presence.

01 — Style
Two silhouettes for a stationary panel — pick the one that matches the feel of the room.
A sleek expression that emphasizes clean lines — architectural, modern, and quietly tailored.
Softly gathered for a more classic look — a fuller, more traditional silhouette with gentle fullness across the panel.
02 — Fabric & Color
Designer-curated for fixed curtain application — lightweight fabrics that suit smaller-scale window treatment.
Linen — Everhem Hues
7 fabrics
Quartz
Driftwood
Flax
Granite
Umber
Cognac
Juniper
Sheers
3 fabrics
Moon
Bone
Pebble
Carly Kuhn Collection
4 fabrics
Starry Moons
Winking Diamonds
Dainty Rose
Circus Circus
Jake Arnold for Everhem
11 fabrics
Manor Linen Gardenia
Windsor Diamond Magnolia
Herringbone Haze
Herringbone Saffron
Manor Linen Limestone
Manor Linen Mist
Manor Linen Citrine
Windsor Diamond Parchment
Magnolia Sheer
Parchment Sheer
Parlor Stripe Sheer
03 — Lining
Fixed curtains are designed exclusively unlined — the lining decision is already made for you.

They offer a subtle sense of privacy while letting light pour into the room.
04 — Hardware Finish
All three finishes are solid metal — choose based on the warm or cool tones in your room.
Warm, golden — pairs with creams, woods, and warm whites.
Deep, rich brown — anchors a room with darker palettes or natural materials.
Crisp matte black — modern, graphic, and clean against light walls.
Rod size · fixed
3/8" diameter rod
All fixed curtain rods come in a single 3/8" diameter — the same slimmer profile as café curtains, sized for the smaller-scale fixed application. No selection required.
05 — Mount Position
Where the rods live on your window — fixed curtains use a rod at the top and a rod at the bottom, with the panel sliding through a pocket on each.
Both rods install inside the window casement — top and bottom — with the panel pocketed onto each. A clean, recessed look that sits flush with the trim.
Best for: trim you want to show, deeper windows, architectural moments.
Depth requirement
3/4" minimum
You need 3/4" of depth on the inside of the window casement to install the top and bottom rods. Measure the available depth before choosing inside mount.
Both rods install on the face of the window trim — the panel slides onto the top rod and the bottom rod through pockets at each end. A softer profile when inside depth isn't available.
Best for: shallow windows, narrow casements, doors with glass inserts.
Flat space requirement
3/4" minimum
You need 3/4" of flat mounting space on the face of the window trim — top and bottom — to install the rods.
06 — How to Measure
A tape measure is all you need. Inside and outside mount take the same two measurements — door mount has its own four-step process.
Pro note — your tape measure needs ⅛" tick marks visible.
Two simple measurements — same instructions whether you're mounting inside the casement or on the trim face.

The total height you want covered — measure from where the top rod will mount down to where the bottom rod will mount. Round down to the nearest ⅛".
Measure horizontally along the top mount line, end to end of where the rods will cover. Round down to the nearest ⅛".
Rule of thumb
Two scenarios — pick the one that fits your window.
No grid lines
Mount at roughly the vertical halfway point — measure your window's height, divide by two, and use that as your top rod line.
Window has grid lines
Pick the grid line nearest the halfway point and mount along it. The rod reading flush with the muntin looks cleaner than splitting a pane.
Door mount is an outside mount application — measure the glass insert, then add for coverage and mounting space.
Step 01
Measure the height of the glass insert on your door, top edge to bottom edge. Round down to the nearest ⅛".
Add length for coverage
Add 2" to the top and 2" to the bottom of your glass height — 4" total — to allow for proper coverage and mounting space.
Step 02
Measure the width of the glass insert on your door, edge to edge. Round down to the nearest ⅛".
Add width for coverage
Add 2" to each side of your glass width — 4" total — to allow for proper coverage and mounting space.
Other Configurations
Already have hardware, or already have curtains? Order each on its own — here's how the steps from this guide still apply.
Fixed Curtains Only
We'll handle the panels. The measurements above are exactly what you'll provide — no deductions or extra steps.
Hardware Only
We'll handle the rods, brackets, and pocket hardware. Just choose your total rod length — that's the only measurement that applies.
Your guide to hardware — by Everhem experts
Rods, rings, and brackets — engineered to suit each Everhem product. Walk through the choices for drapery, café curtains, and fixed curtains in one place.

01 — Drapery Hardware
Made for a pair of drapery and shipped complete with rings and brackets for mounting with ease.
Step 1 · Style
Choose a silhouette that fits your room.
A clean 90° bend that returns the rod to the wall — minimal and architectural.
A soft, rounded return — gentler in profile and slightly more traditional.
A turned ball at the end of the rod — classic, decorative, and finished.
Step 2 · Finish
All three finishes are solid metal — choose based on the warm or cool tones in your room.
Warm, golden — pairs with creams, woods, and warm whites.
Deep, rich brown — anchors a room with darker palettes or natural materials.
Crisp matte black — modern, graphic, and clean against light walls.
Step 3 · Rod Size
Choose the rod thickness that matches the visual weight of your drapery and room.
Slimmer profile — best for lighter fabrics and smaller-scale rooms.
Substantial profile — supports heavier fabrics and longer rod runs.
02 — Café Curtain Hardware
Sized for half-window panels — ships complete with rings and end brackets.
Where the rod lives on your window.
The rod installs inside the window casement, recessed into the frame for a clean, built-in look.
Best for: trim you want to show, deeper windows, architectural moments.
Depth requirement
3/4" minimum
You need 3/4" of depth on the inside of the window casement to install a café curtain rod. Measure the available depth before choosing inside mount.
The rod installs on the face of the window trim — a softer profile that works when inside depth isn't available.
Best for: shallow windows, narrow casements, or any window where you can't recess hardware.
Flat space requirement
3/4" minimum
You need 3/4" of flat mounting space on the face of the window trim. Measure the available flat surface before choosing outside mount.
Step 2 · Finish
Same three solid-metal finishes — pick based on the warm or cool tones in your room.
Warm, golden — pairs with creams, woods, and warm whites.
Deep, rich brown — anchors a room with darker palettes or natural materials.
Crisp matte black — modern, graphic, and clean against light walls.
Step 3 · Rod Size
Café curtain rods come in a single, slimmer profile sized for half-window panels.
Rod size · fixed
3/8" diameter rod
All café curtain rods come in a single 3/8" diameter — the slimmer profile suits the smaller scale of half-window panels. No selection required.
03 — Fixed Curtain Hardware
Ordered as a set with a rod at the top and a rod at the bottom — ships complete with end brackets.
Step 1 · Mount Position
Where the top and bottom rods live on your window — fixed curtains pocket onto a rod at each end.
Both rods install inside the window casement — top and bottom — with the panel pocketed onto each. A clean, recessed look that sits flush with the trim.
Best for: trim you want to show, deeper windows, architectural moments.
Depth requirement
3/4" minimum
You need 3/4" of depth on the inside of the window casement to install the top and bottom rods. Measure the available depth before choosing inside mount.
Both rods install on the face of the window trim — the panel slides onto the top rod and the bottom rod through pockets at each end. A softer profile when inside depth isn't available.
Best for: shallow windows, narrow casements, doors with glass inserts.
Flat space requirement
3/4" minimum
You need 3/4" of flat mounting space on the face of the window trim — top and bottom — to install the rods.
Step 2 · Finish
Same three solid-metal finishes — pick based on the warm or cool tones in your room.
Warm, golden — pairs with creams, woods, and warm whites.
Deep, rich brown — anchors a room with darker palettes or natural materials.
Crisp matte black — modern, graphic, and clean against light walls.
Step 3 · Rod Size
Fixed curtain rods come in a single, slimmer profile — one rod for the top and one for the bottom.
Rod size · fixed
3/8" diameter rod
All fixed curtain rods come in a single 3/8" diameter — the same slimmer profile as café curtains, sized for the smaller-scale fixed application. No selection required.
04 — How to Order
Pick the product, choose your specs, add to cart.
Drapery Hardware
Four steps from style to length.
Step 01
Right-Angle Return, Curved Return, or Ball Finial.
Step 02
Brass, Bronze, or Black.
Step 03
3/4" or 1" diameter.
Step 04
End to end, in eighths of an inch — the total span you want the rod to cover.
Café Curtain Hardware
Mount, finish, and the total width to cover.
Step 01
Inside or Outside — both require 3/4" of depth or flat trim space.
Step 02
Brass, Bronze, or Black.
Step 03
The total span you'd like the rod to cover, in eighths of an inch.
Fixed Curtain Hardware
Same flow as café — ships as a set with a rod at the top and a rod at the bottom.
Step 01
Inside or Outside — both require 3/4" of depth or flat trim space at the top and bottom.
Step 02
Brass, Bronze, or Black.
Step 03
The total span you'd like the rods to cover, in eighths of an inch.
What's included
Every Everhem hardware order ships complete with the matching rings (drapery and café) and brackets — no separate parts to source.
Measure & Install Guides
Every measure and install guide for every Everhem configuration — grouped by product, mount, control, and operation.
01
Roman & Woven Wood shades install by mount, control type, and front- or back-operation. Roller shades follow a simpler path — mount + control.
Measure guides
Install guides
Roman & Woven Wood · Inside mount
Chain loop · front operation Chain loop · back operation Cordless · front operation Cordless · back operation Motorized · front operation Motorized · back operationRoman & Woven Wood · Outside mount
Chain loop · front operation Chain loop · back operation Cordless · front operation Cordless · back operation Motorized · front operation Motorized · back operationRoller · Inside mount
Chain loop Cordless MotorizedRoller · Outside mount
Chain loop Cordless Motorized02
Install guides are grouped by rod configuration — single or double — and by finial or return style.
Measure guides
Install guides
Single rod
Ball finial Curved return Right angle returnDouble rod
Ball finial Curved return Right angle return03
One measure guide, two install paths — pick inside or outside mount based on where the rod lives.
Measure guides
Install guides